

Team resources
Everything a QSAR member needs to get connected and use the shared map. Bookmark this page — if something here doesn't work, tell Sean.

This page’s QR code — put it on the wall at the QSAR office, in the boats, and in the drone cases.
The server
| What | Where |
|---|---|
| Command tools — one address | https://tak.qsartak.org/go — callout logger, CasEvac board, live map. Open it, then use your browser’s Add to Home Screen for a one-tap icon. |
| Shared map (web browser) | https://tak.qsartak.org — log in with your QSAR username |
| Your account | Made for you by the admin — there is no self-signup. Forgot your password? An admin resets it. |
Get your phone on the map
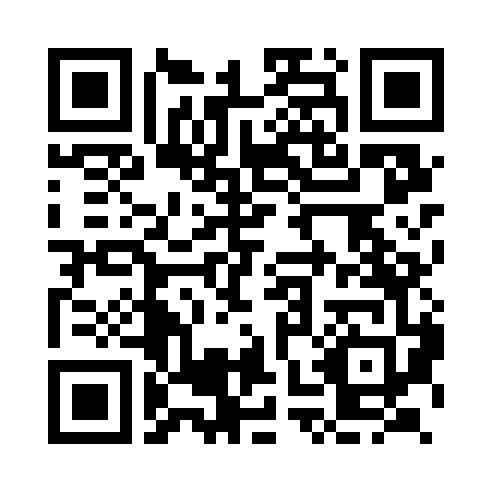
Scan with the phone camera to open the right app store page:
| iPhone — iTAK | Android — ATAK-CIV |
|---|---|
 |
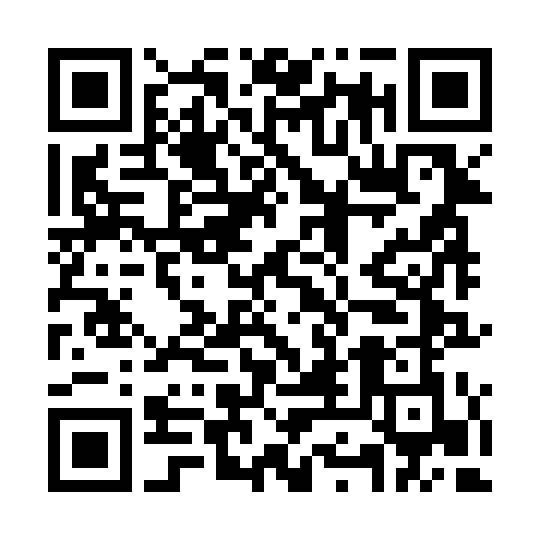 |
(On Google Play the app is named “ATAK-CIV (Civil Use)” — searching
plain “ATAK” won’t find it; search ATAK-CIV with the hyphen.)
iPhone (iTAK):
- Install iTAK from the App Store (QR above).
- On a computer, log into https://tak.qsartak.org and open iTAK QR Code.
- In iTAK: Settings → Servers → + → scan the QR → enter your username and password. Done — you’re on the map.
Android (ATAK):
- Install ATAK-CIV (Civil Use) (QR above, or ask for the team copy — team devices get the version-matched copy from the server).
- Same as above but use the ATAK QR Code page (generate it fresh — it expires).
- Go through setup instructions - select I understand, while using the app, or allow for every option.
- When directed to settings page go through each option and make sure allow permission is enabled for all the options.
- Select Callsign Identity in the TAK Device Setup options.
- Change My Callsign and press done.
- Using the camera app scan the Android QR → Enter tak.qsartak.org in Address → enter Username → enter Password → Press done and allow for the remaining options.
Click to view Android (ATAK) Step-by-Step Screenshots
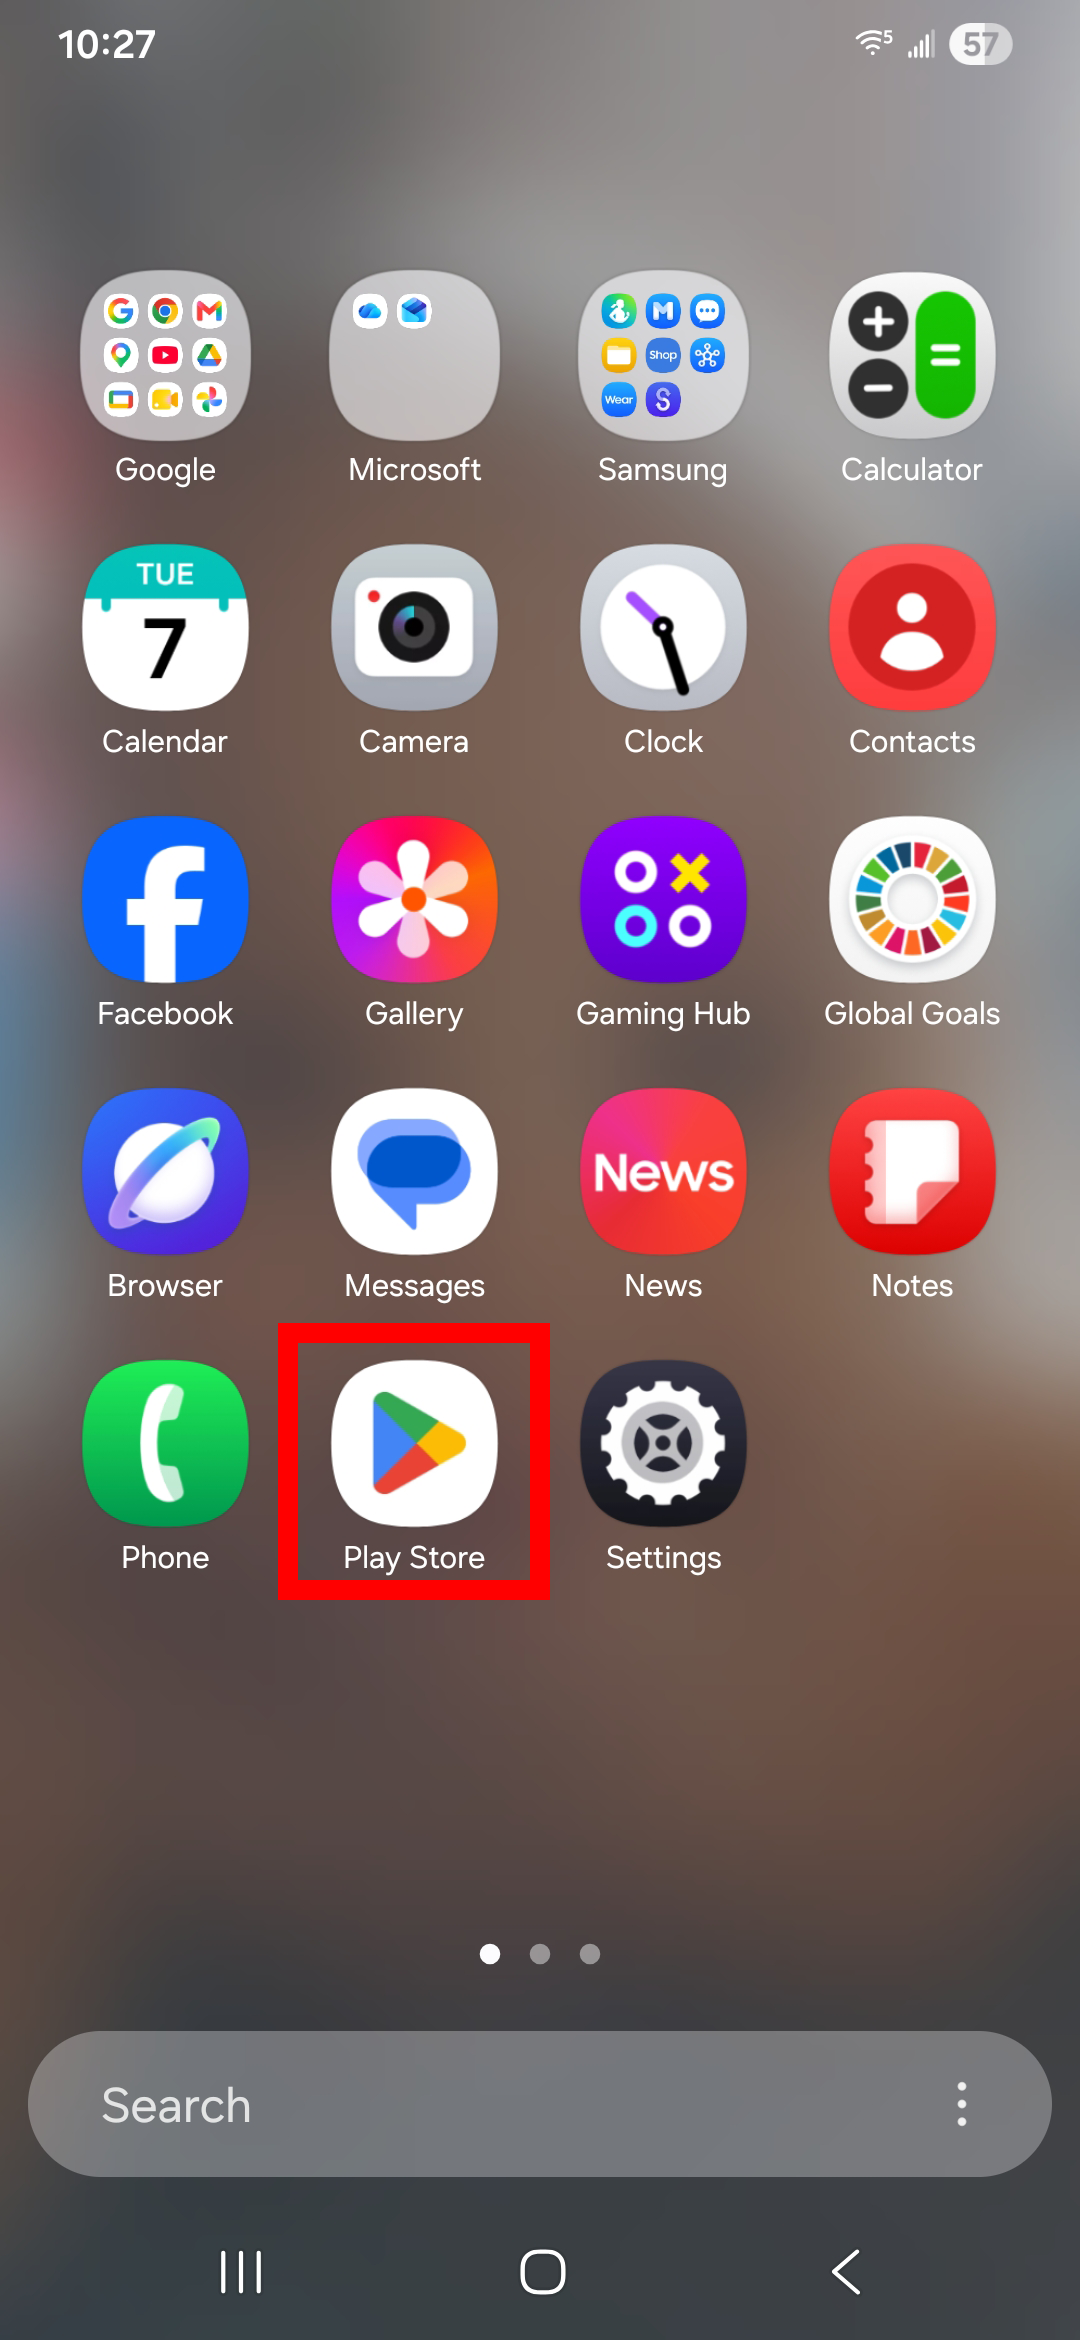 1. Find app store |
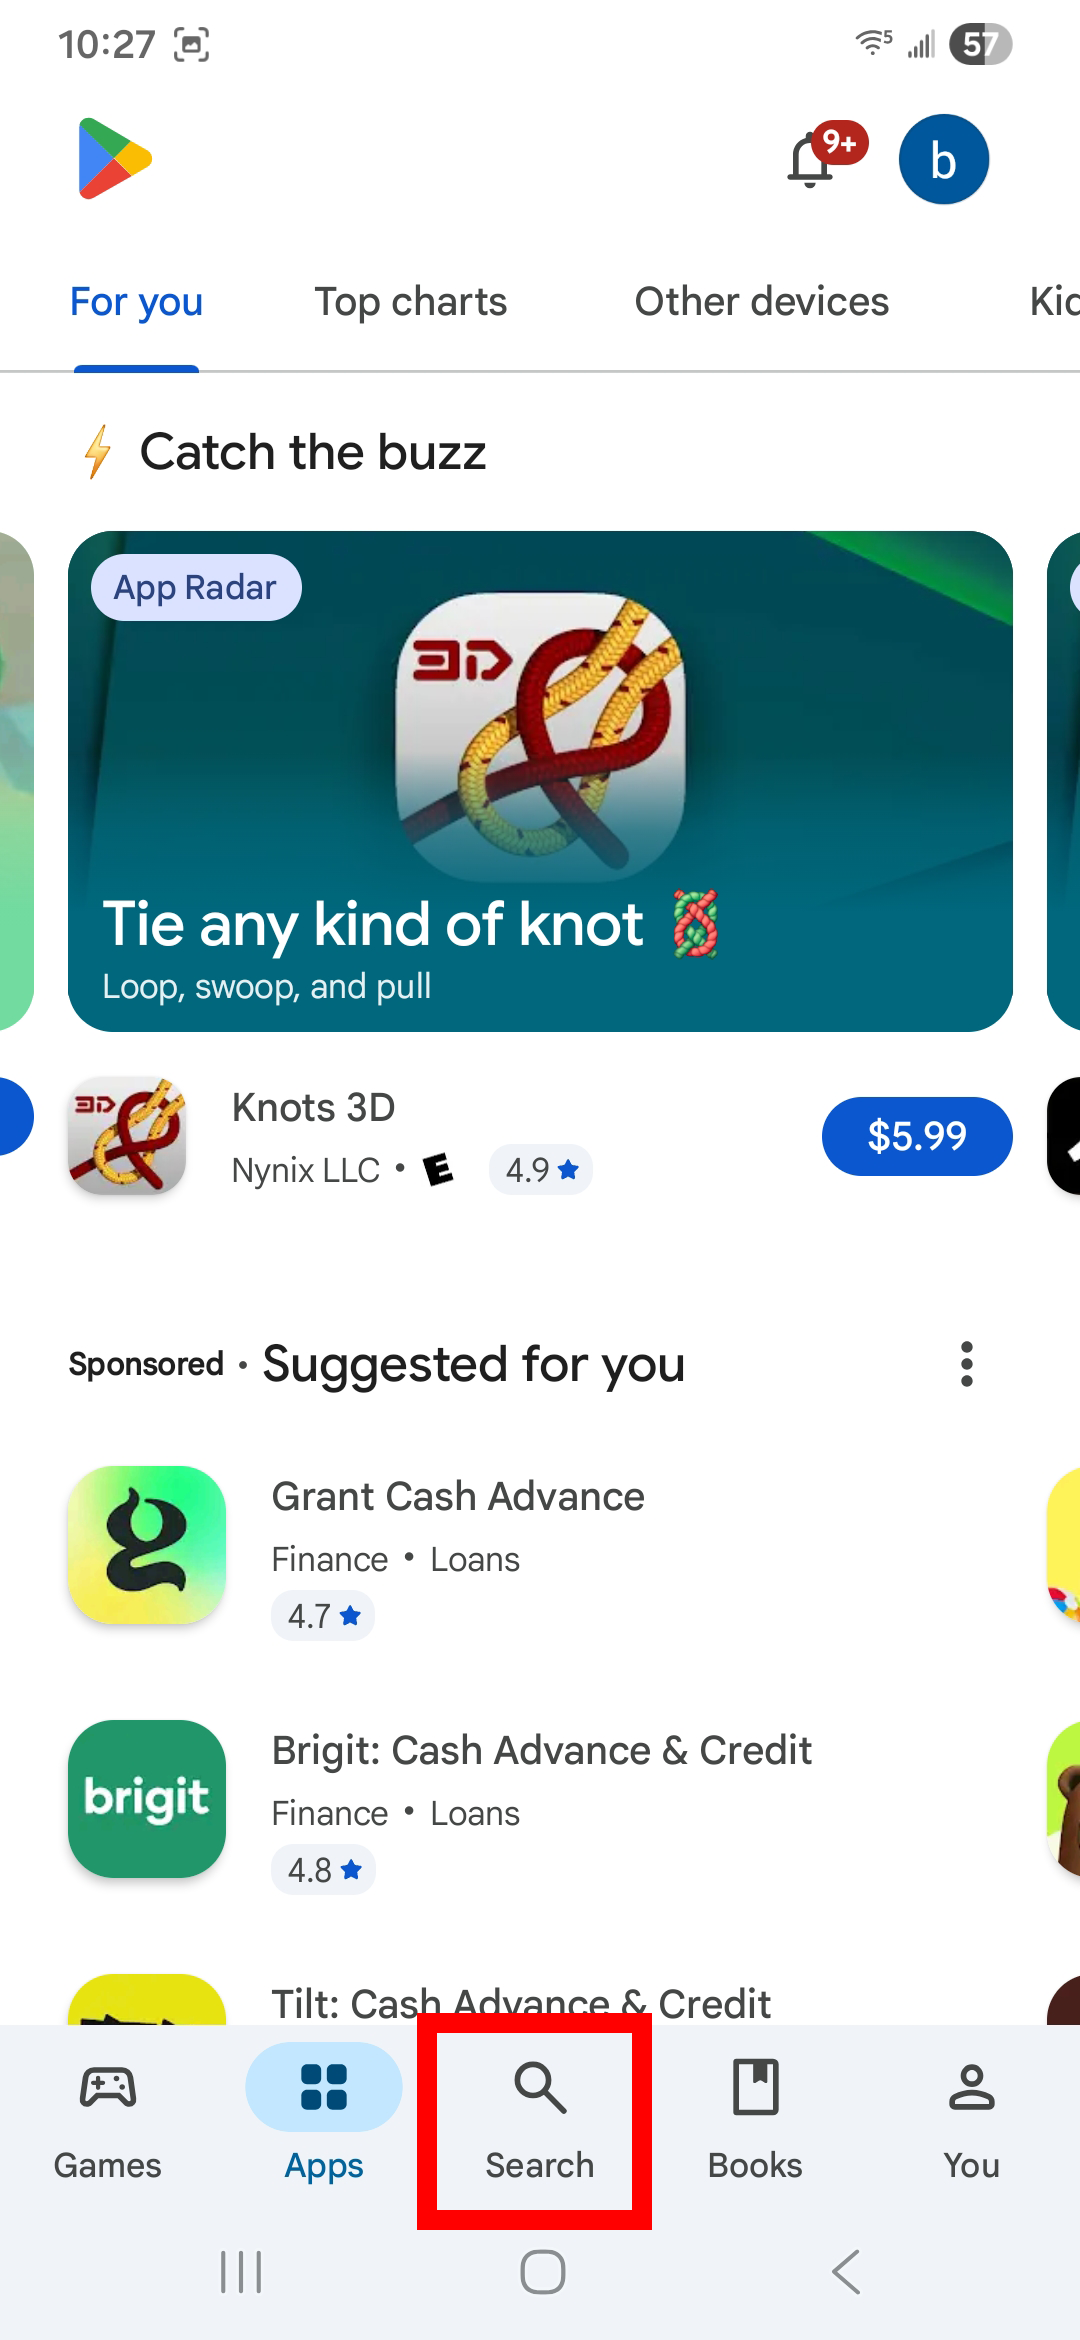 2. Search for ATAK |
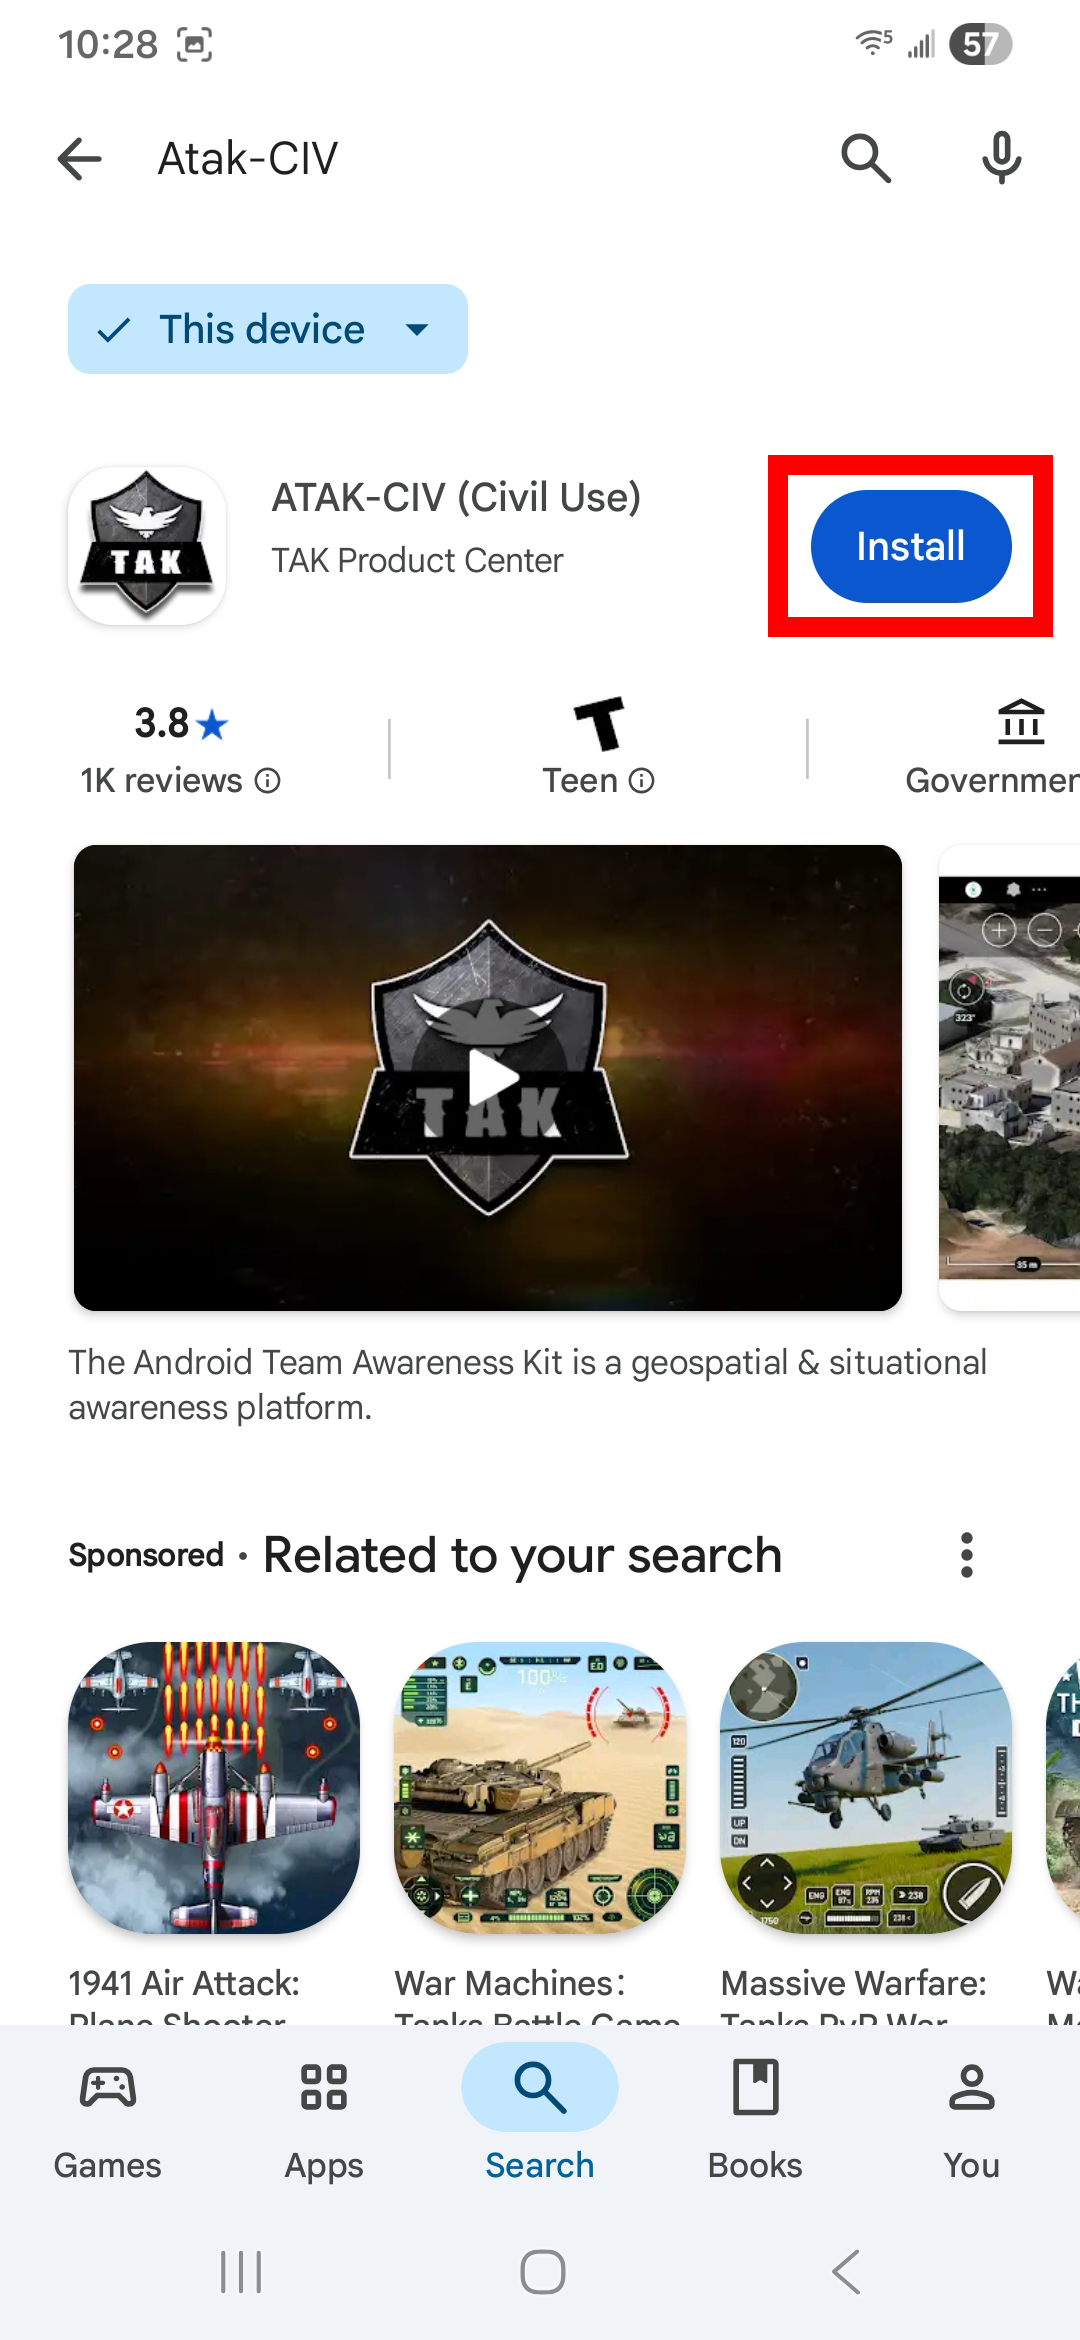 3. Install ATAK |
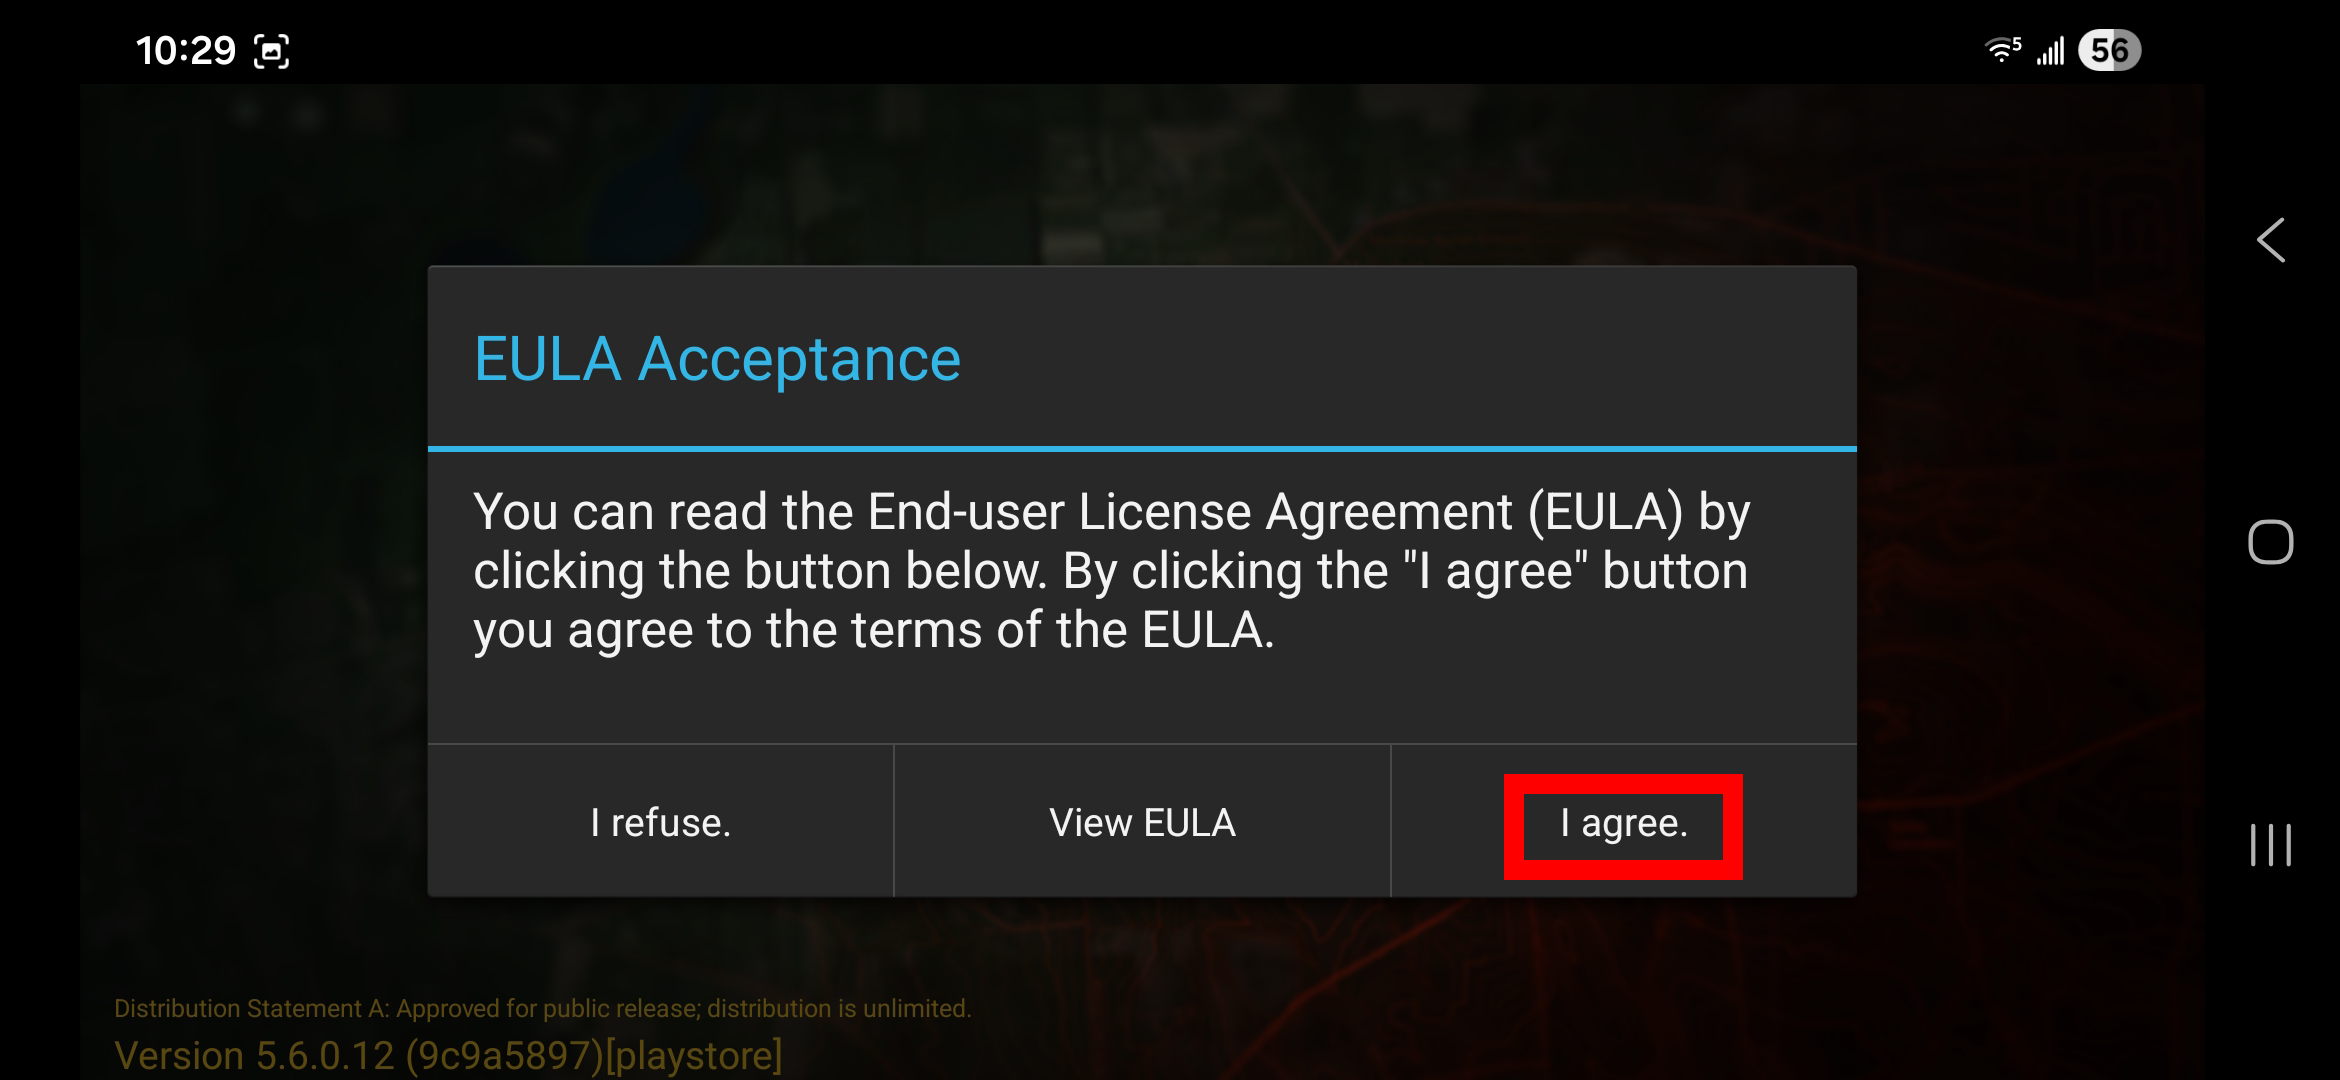 4. Accept and allow all prompts |
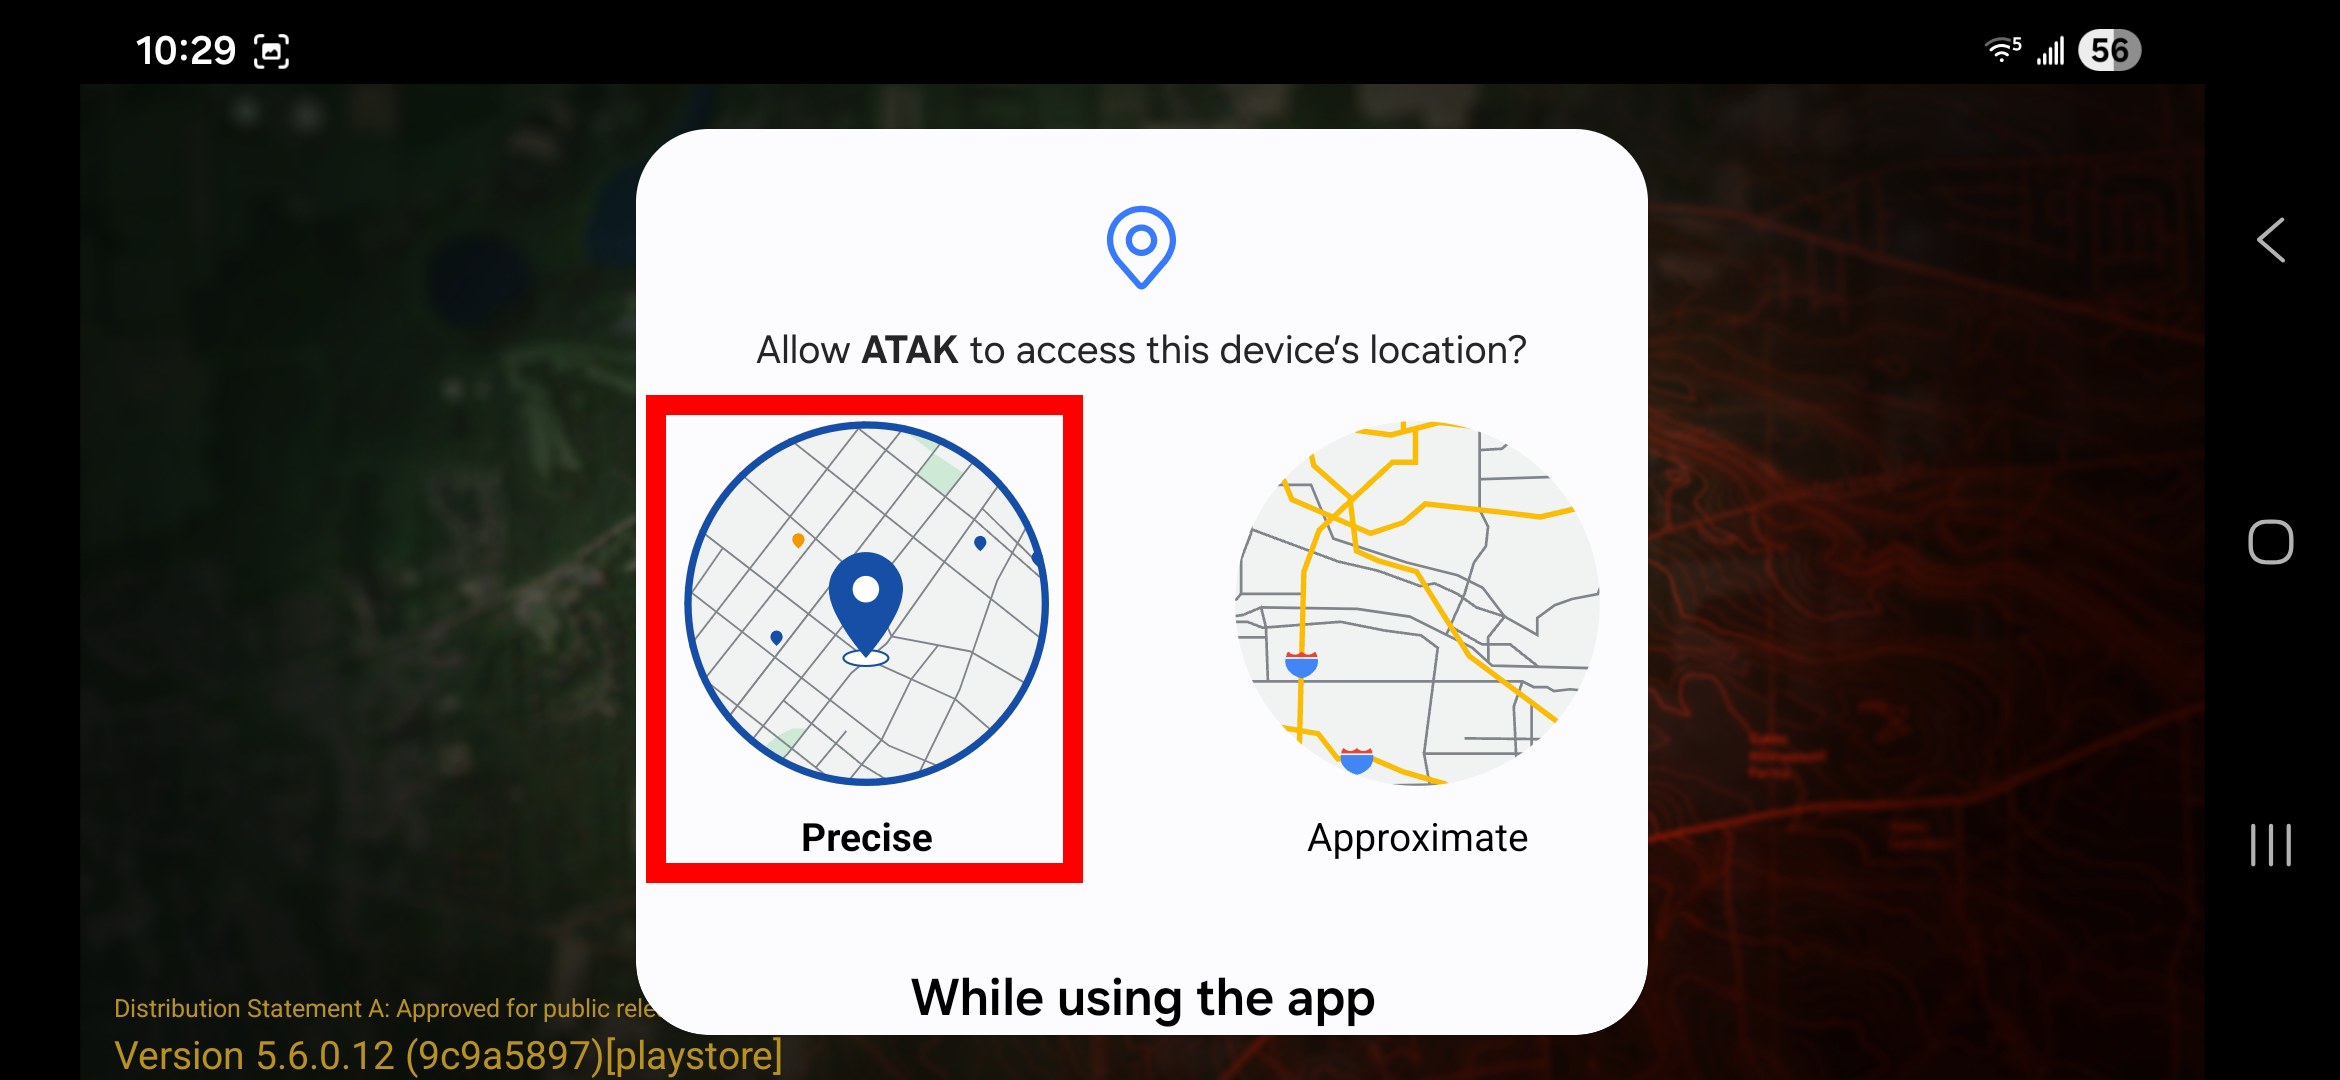 5. Select Precise and While Using App when prompted for location |
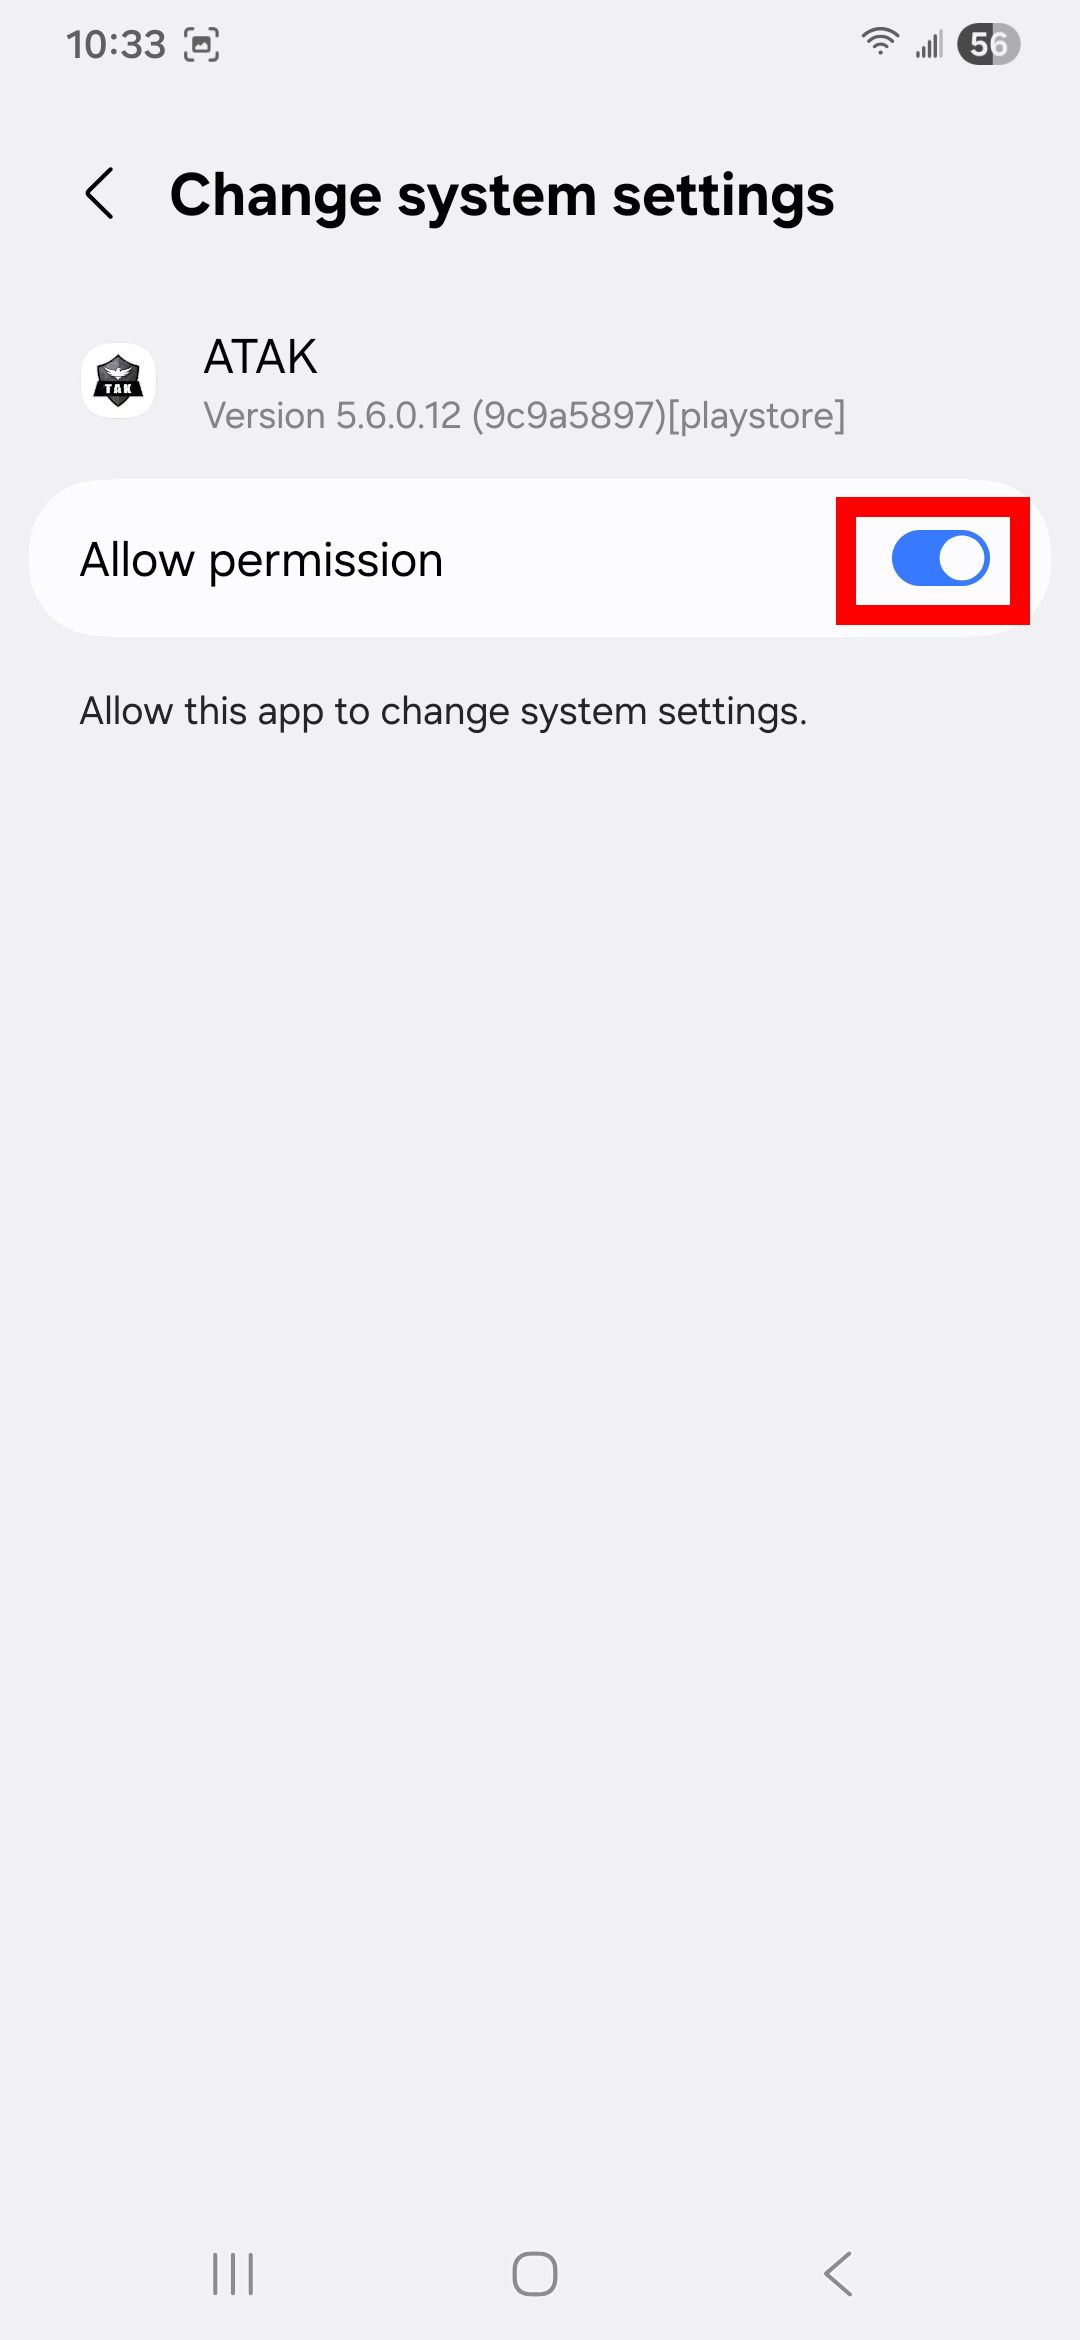 6. When directed to settings allow permissions for all options |
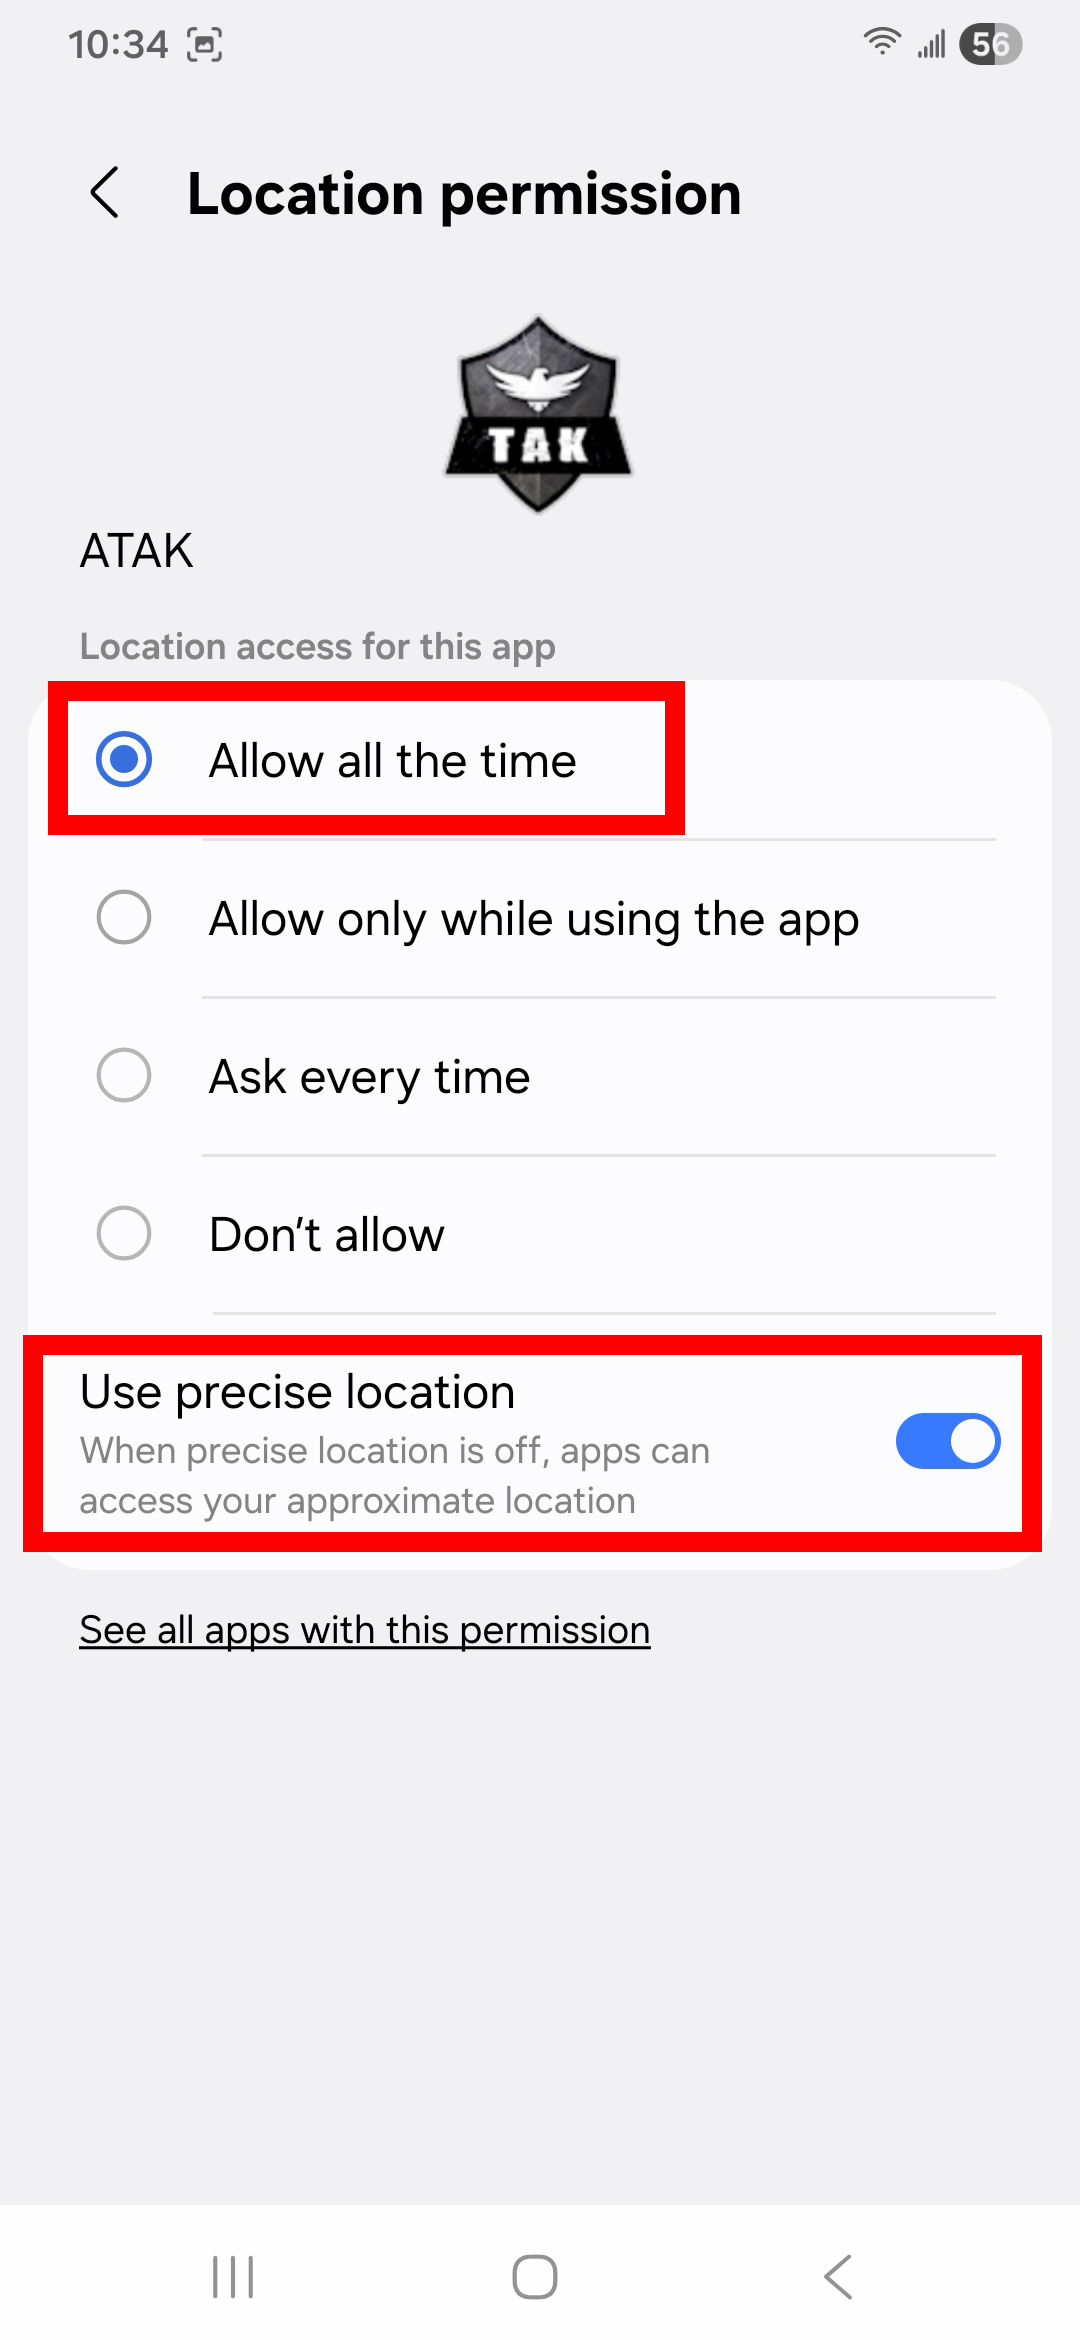 7. Ensure location permissions match image |
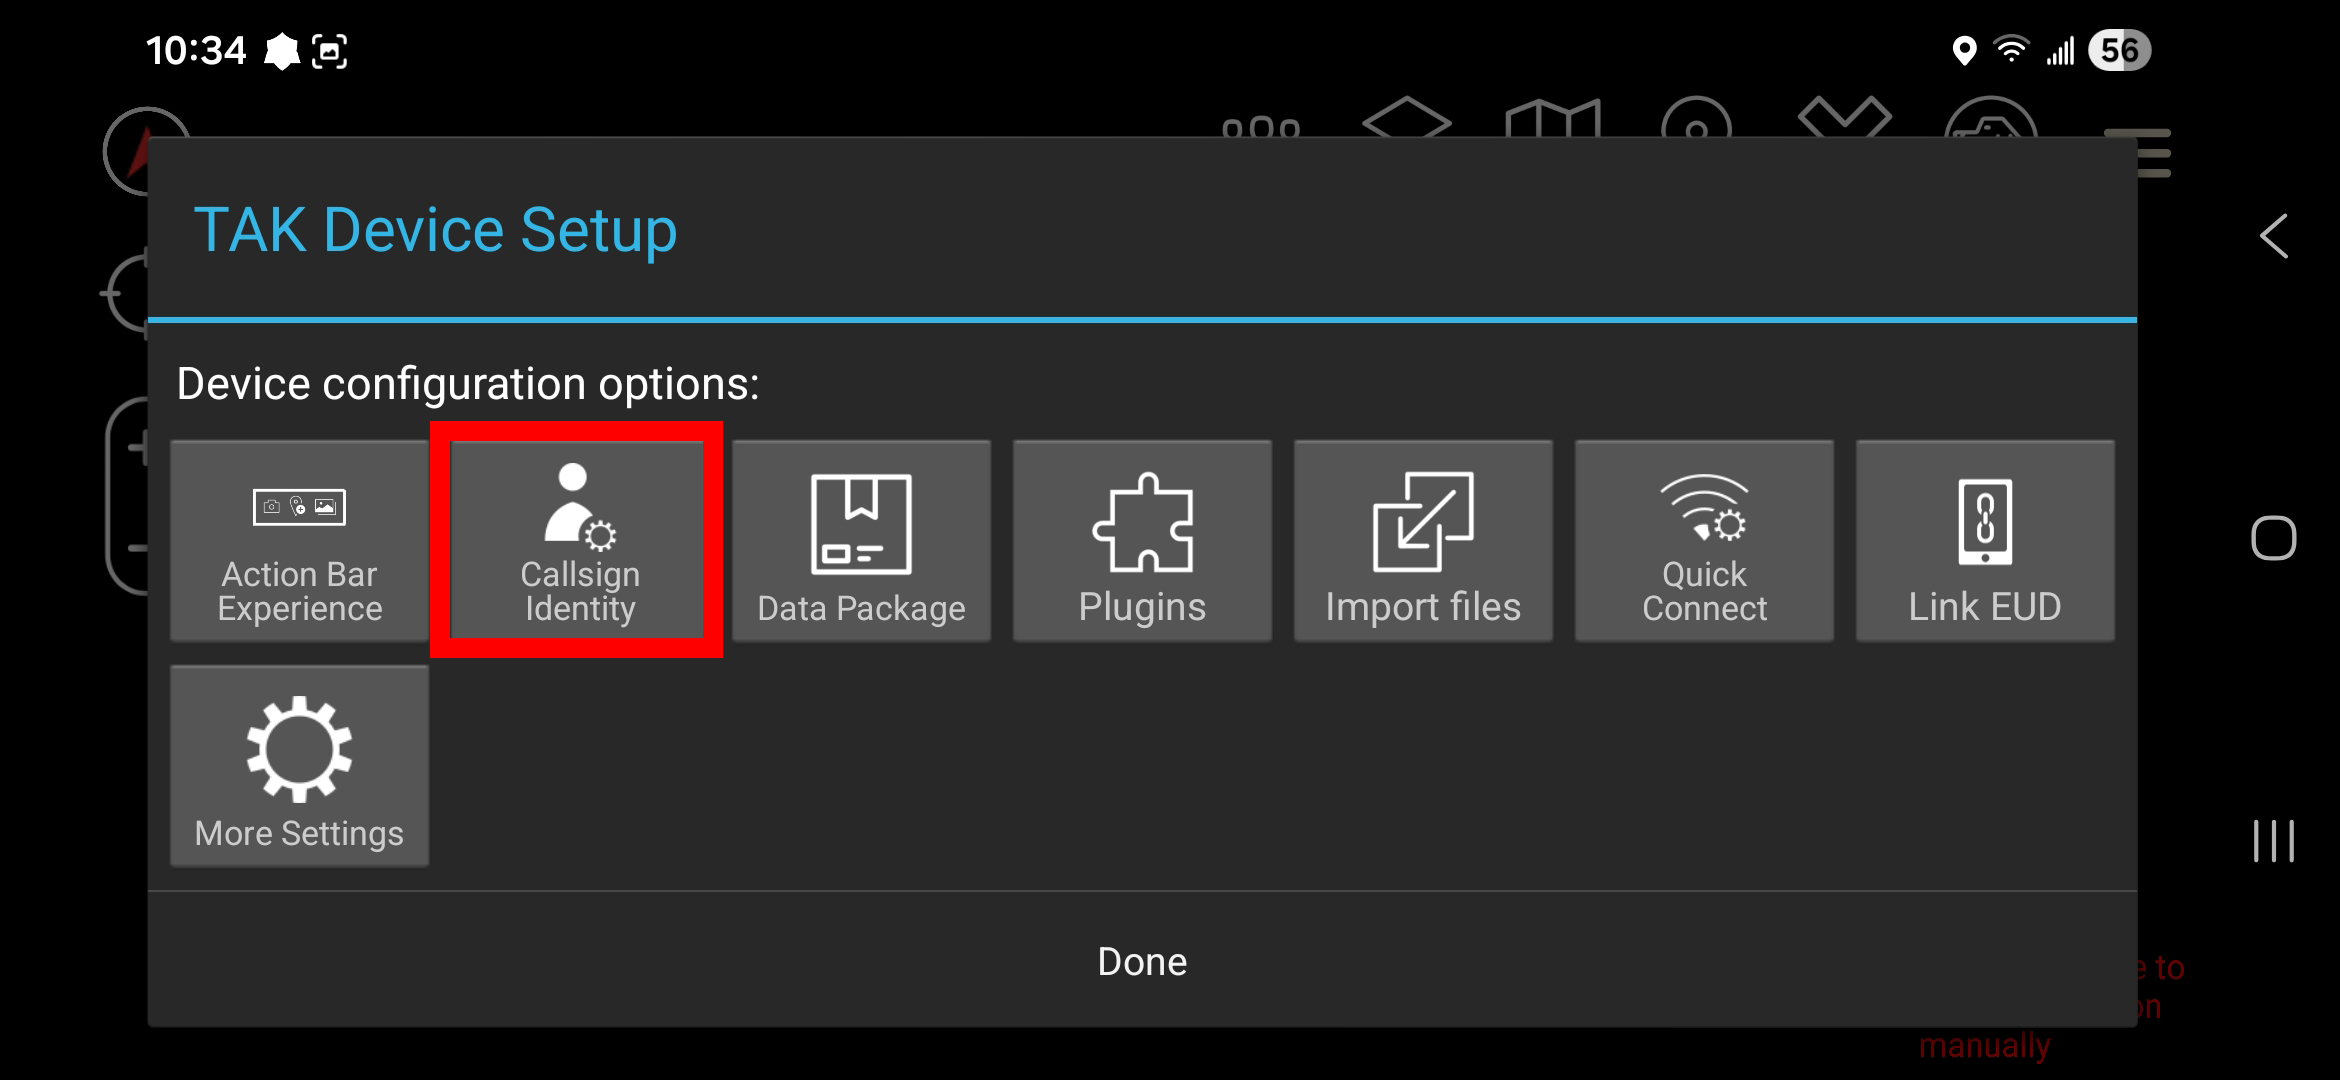 8. Select callsign identity |
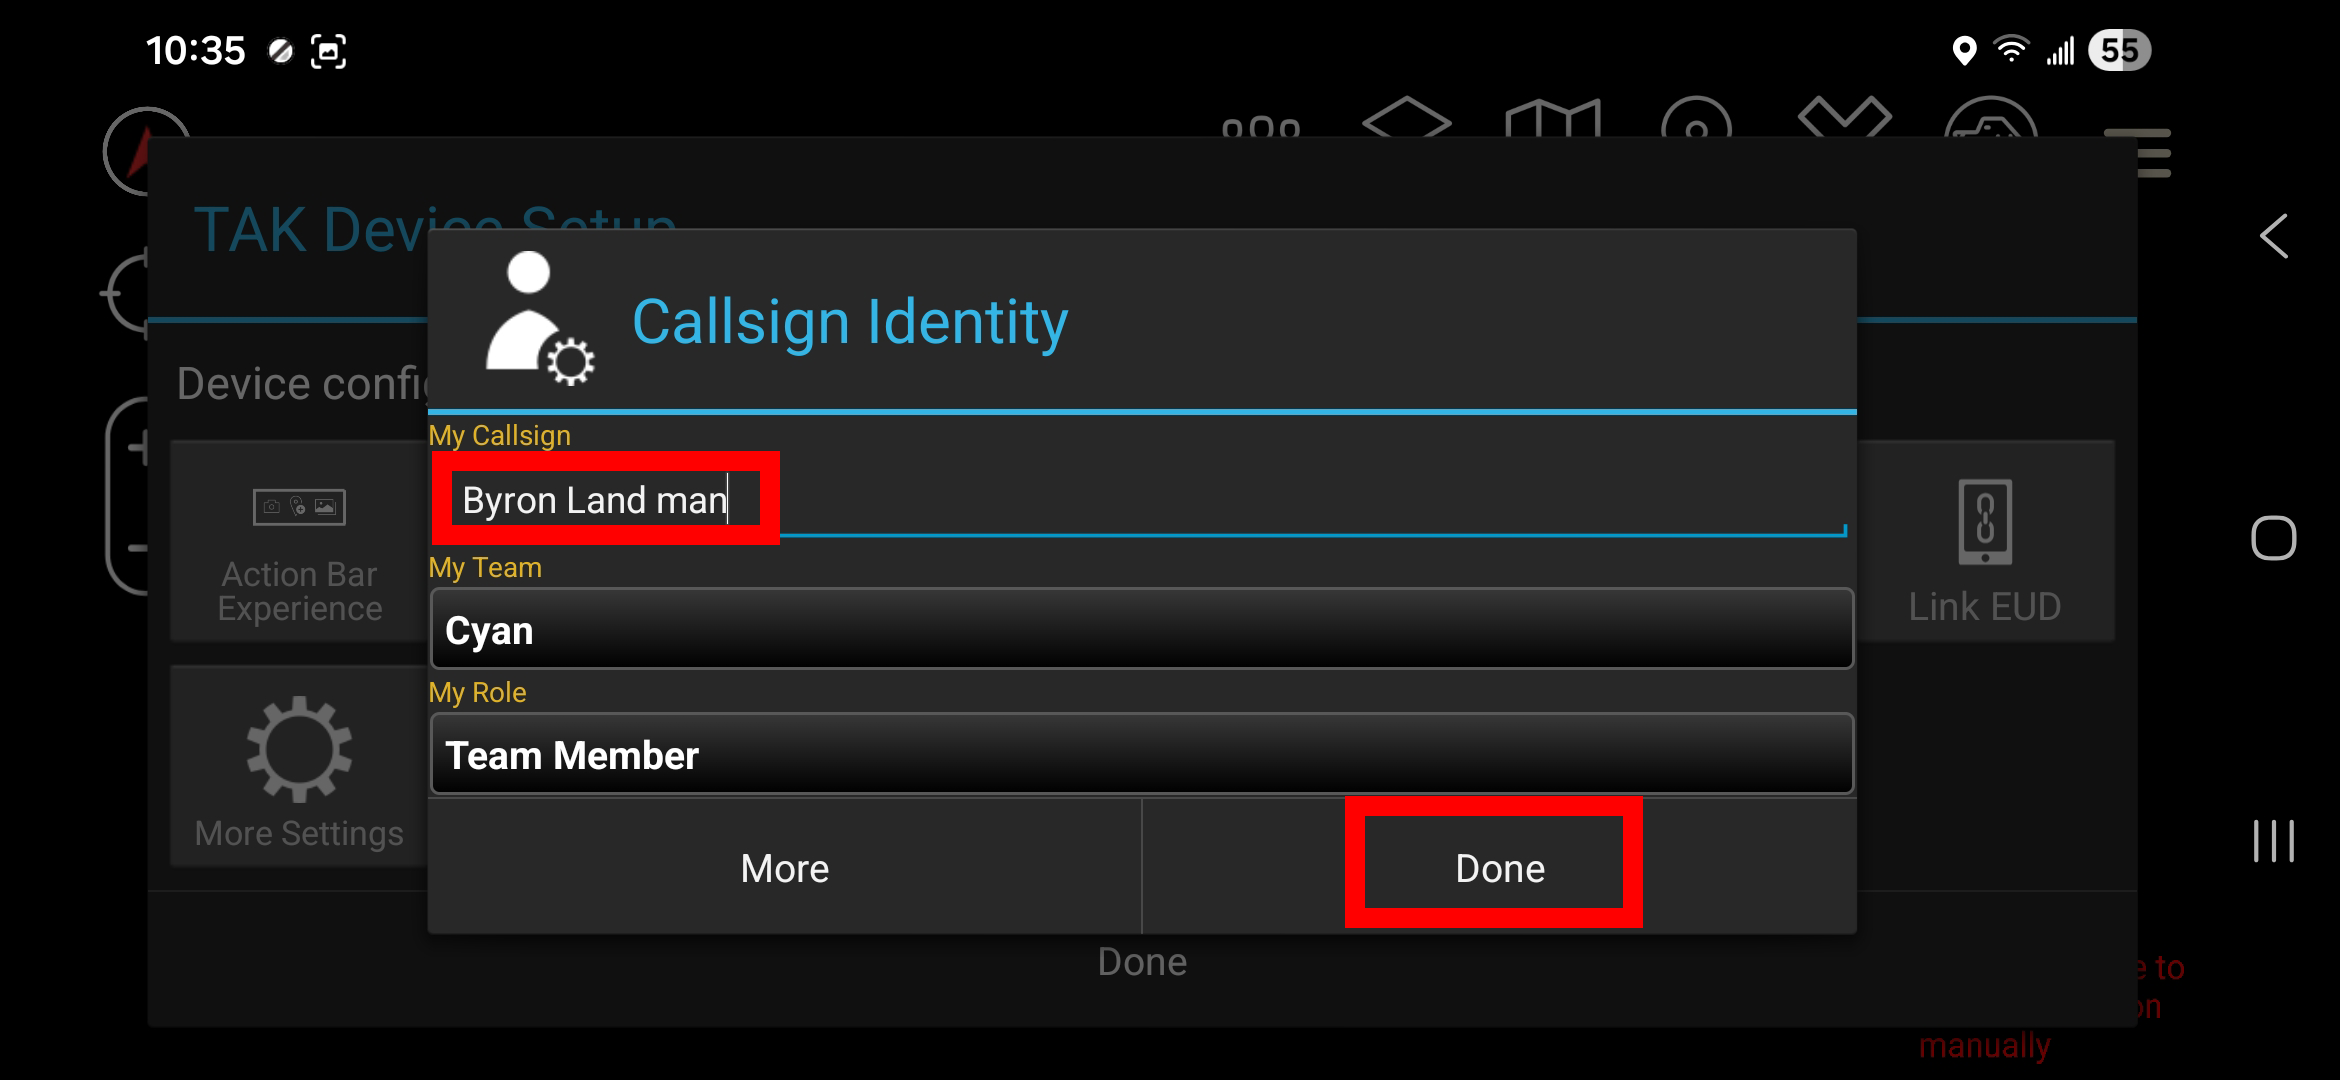 9. Enter your callsign and press done, accept any last prompts on screen |
Get a Windows computer on the map
Running a callout from a laptop or the ICS desktop? Use WinTAK — same map, big screen. It does not use QR codes like the phones do; it needs two certificate files installed by hand.
WinTAK setup guide — allow about fifteen minutes.
Map layers
| Layer | What it shows | Setup |
|---|---|---|
| Marine charts | NOAA nautical charts: depths, shoals, buoys — downloadable for offline boat trips | One-time, per device — see the guide |
| Wave buoys | Live wave height & water temp at Quinhagak, Mud Point, and Halibut 1 — updates every 15 min | Nothing to set up: the buoy markers are on the map automatically. A faded buoy means old data, not calm water. |
| Satellite beacons | Carriers appear on the map from anywhere — no cell/WiFi needed | Charge, turn on, carry. Assign the beacon to its carrier at checkout — see the guide. |
| Trails & overlays | Snow-machine & boat trails as map lines | Automatic — connect to the server and they appear. Nothing to tap. |
Using the map
- How it works — the whole system in plain language
- Glossary — every acronym explained
- Tap any marker for details. Wave buoys show height in feet and water temp in °F, with how old the reading is.
Fix: “I’m at 0,0 / off the coast of Africa” or “No GPS”
If your own dot sits in the middle of the ocean (0,0), or iTAK says “no GPS,” there are two different causes. Check them in this order — the first one is the sneaky one that got us.
Cause 1 (check this FIRST): “My Location” set to Manual
iTAK can put your dot where GPS says you are, or at a spot you placed by hand (Manual). If it’s set to Manual, it ignores the real GPS — that’s what “no GPS / stuck at 0,0” often means.
Fix: in iTAK, open Settings → User Preferences and check the My Location row — it must say GPS, not Manual. Tap it to change, then Save (top right).
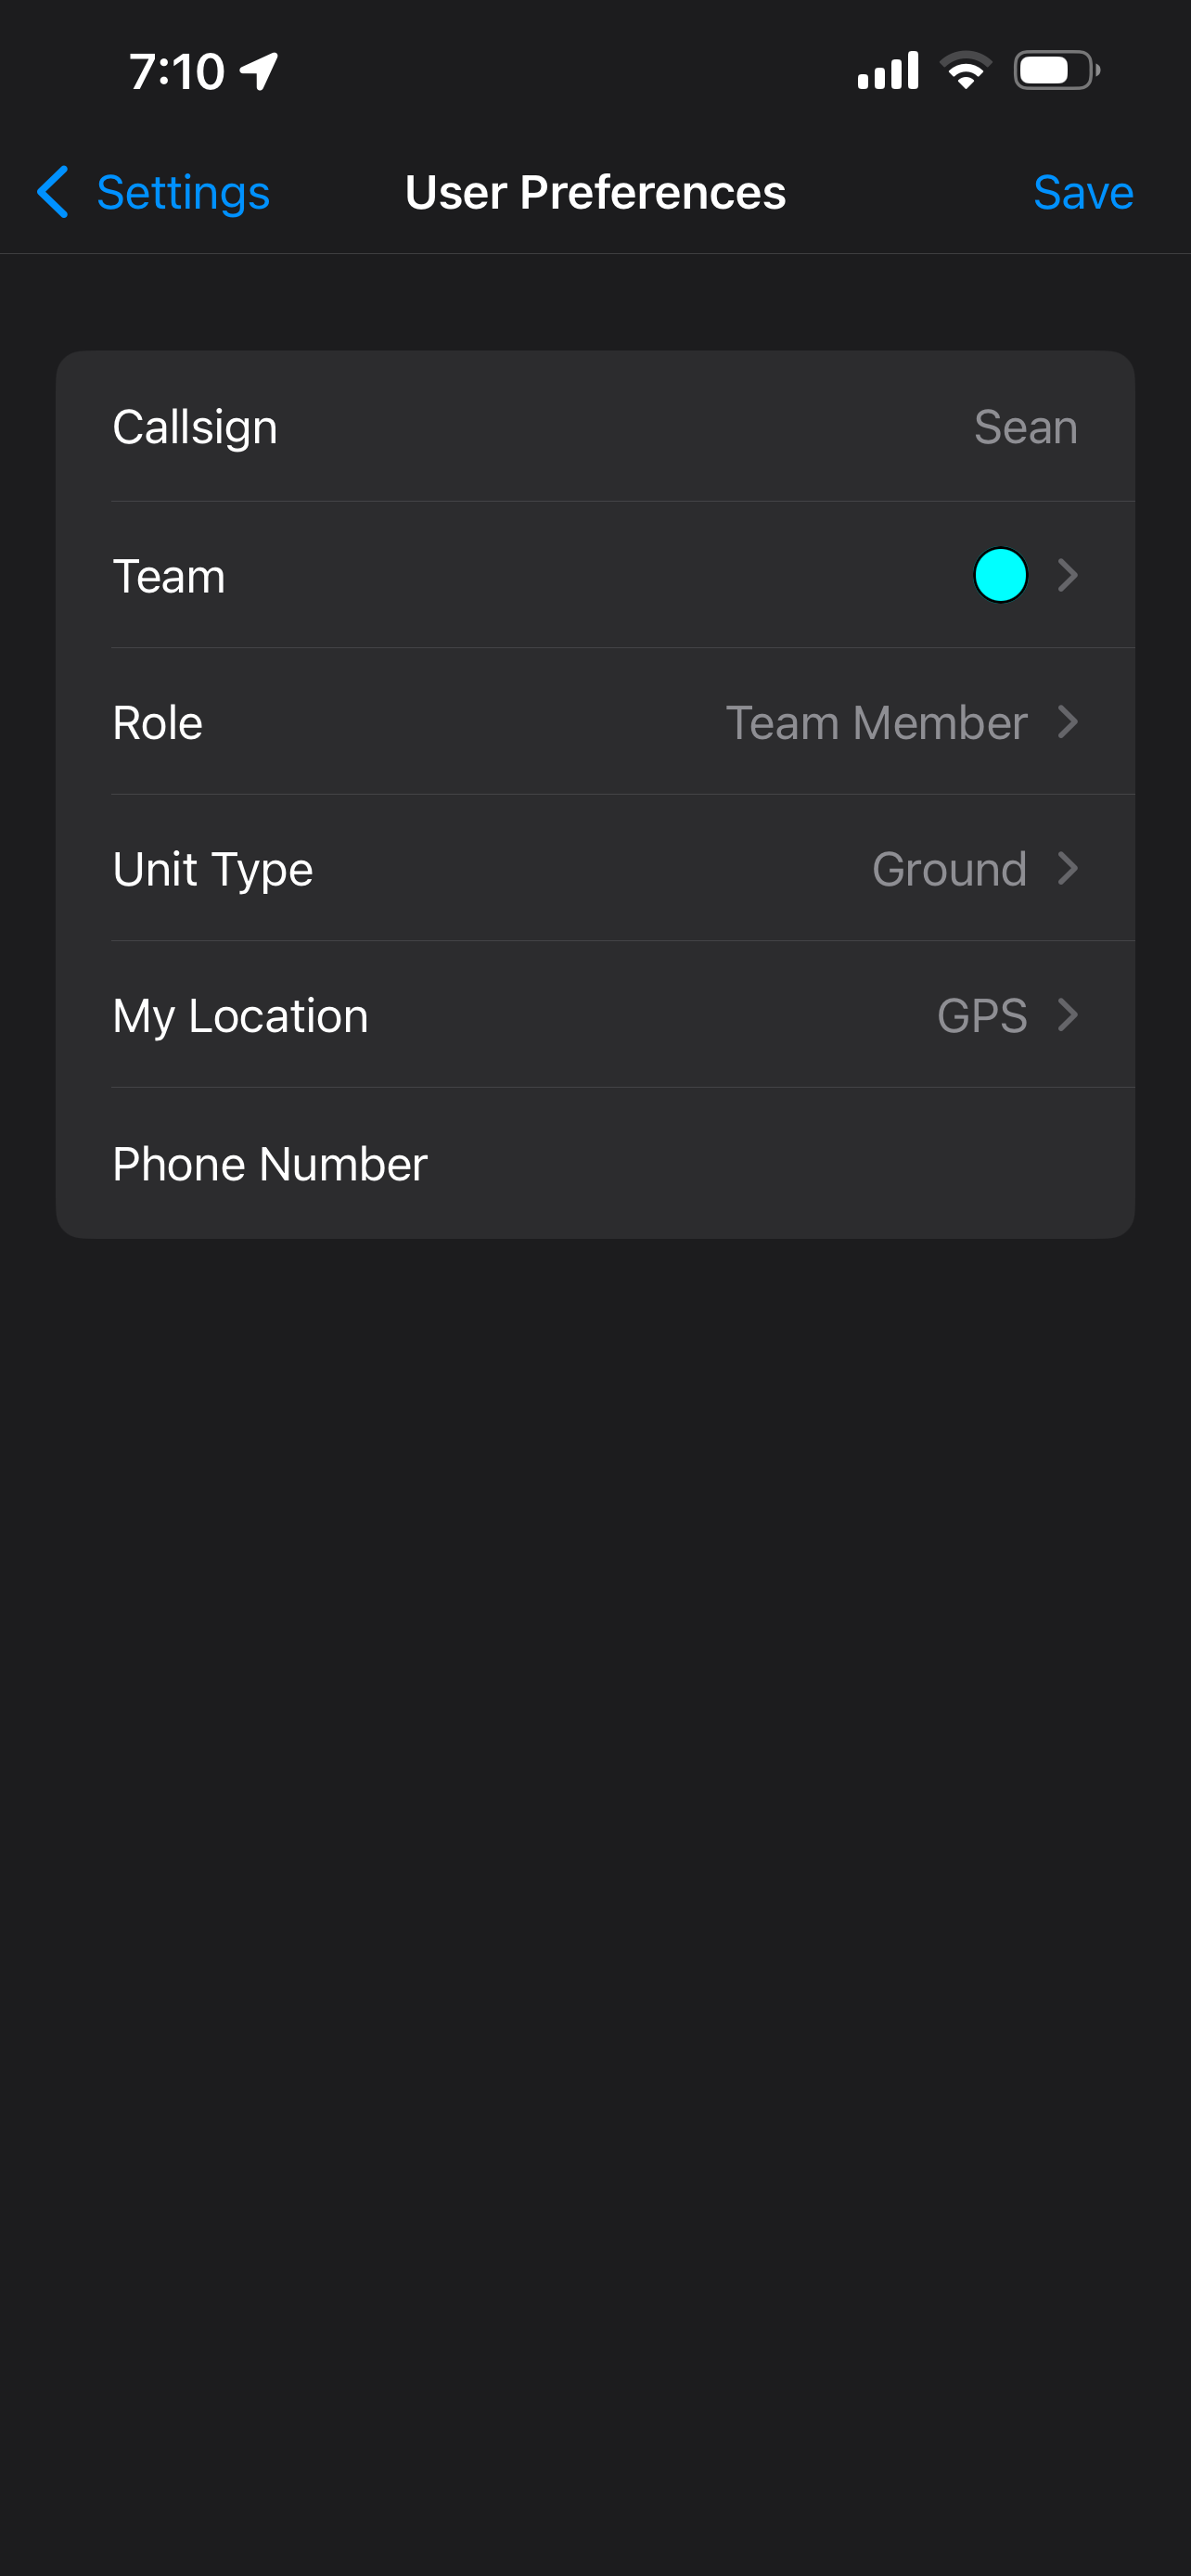
(This was the actual cause on one of our phones — the setting had been left on Manual.)
Cause 2: iPhone isn’t giving iTAK the GPS
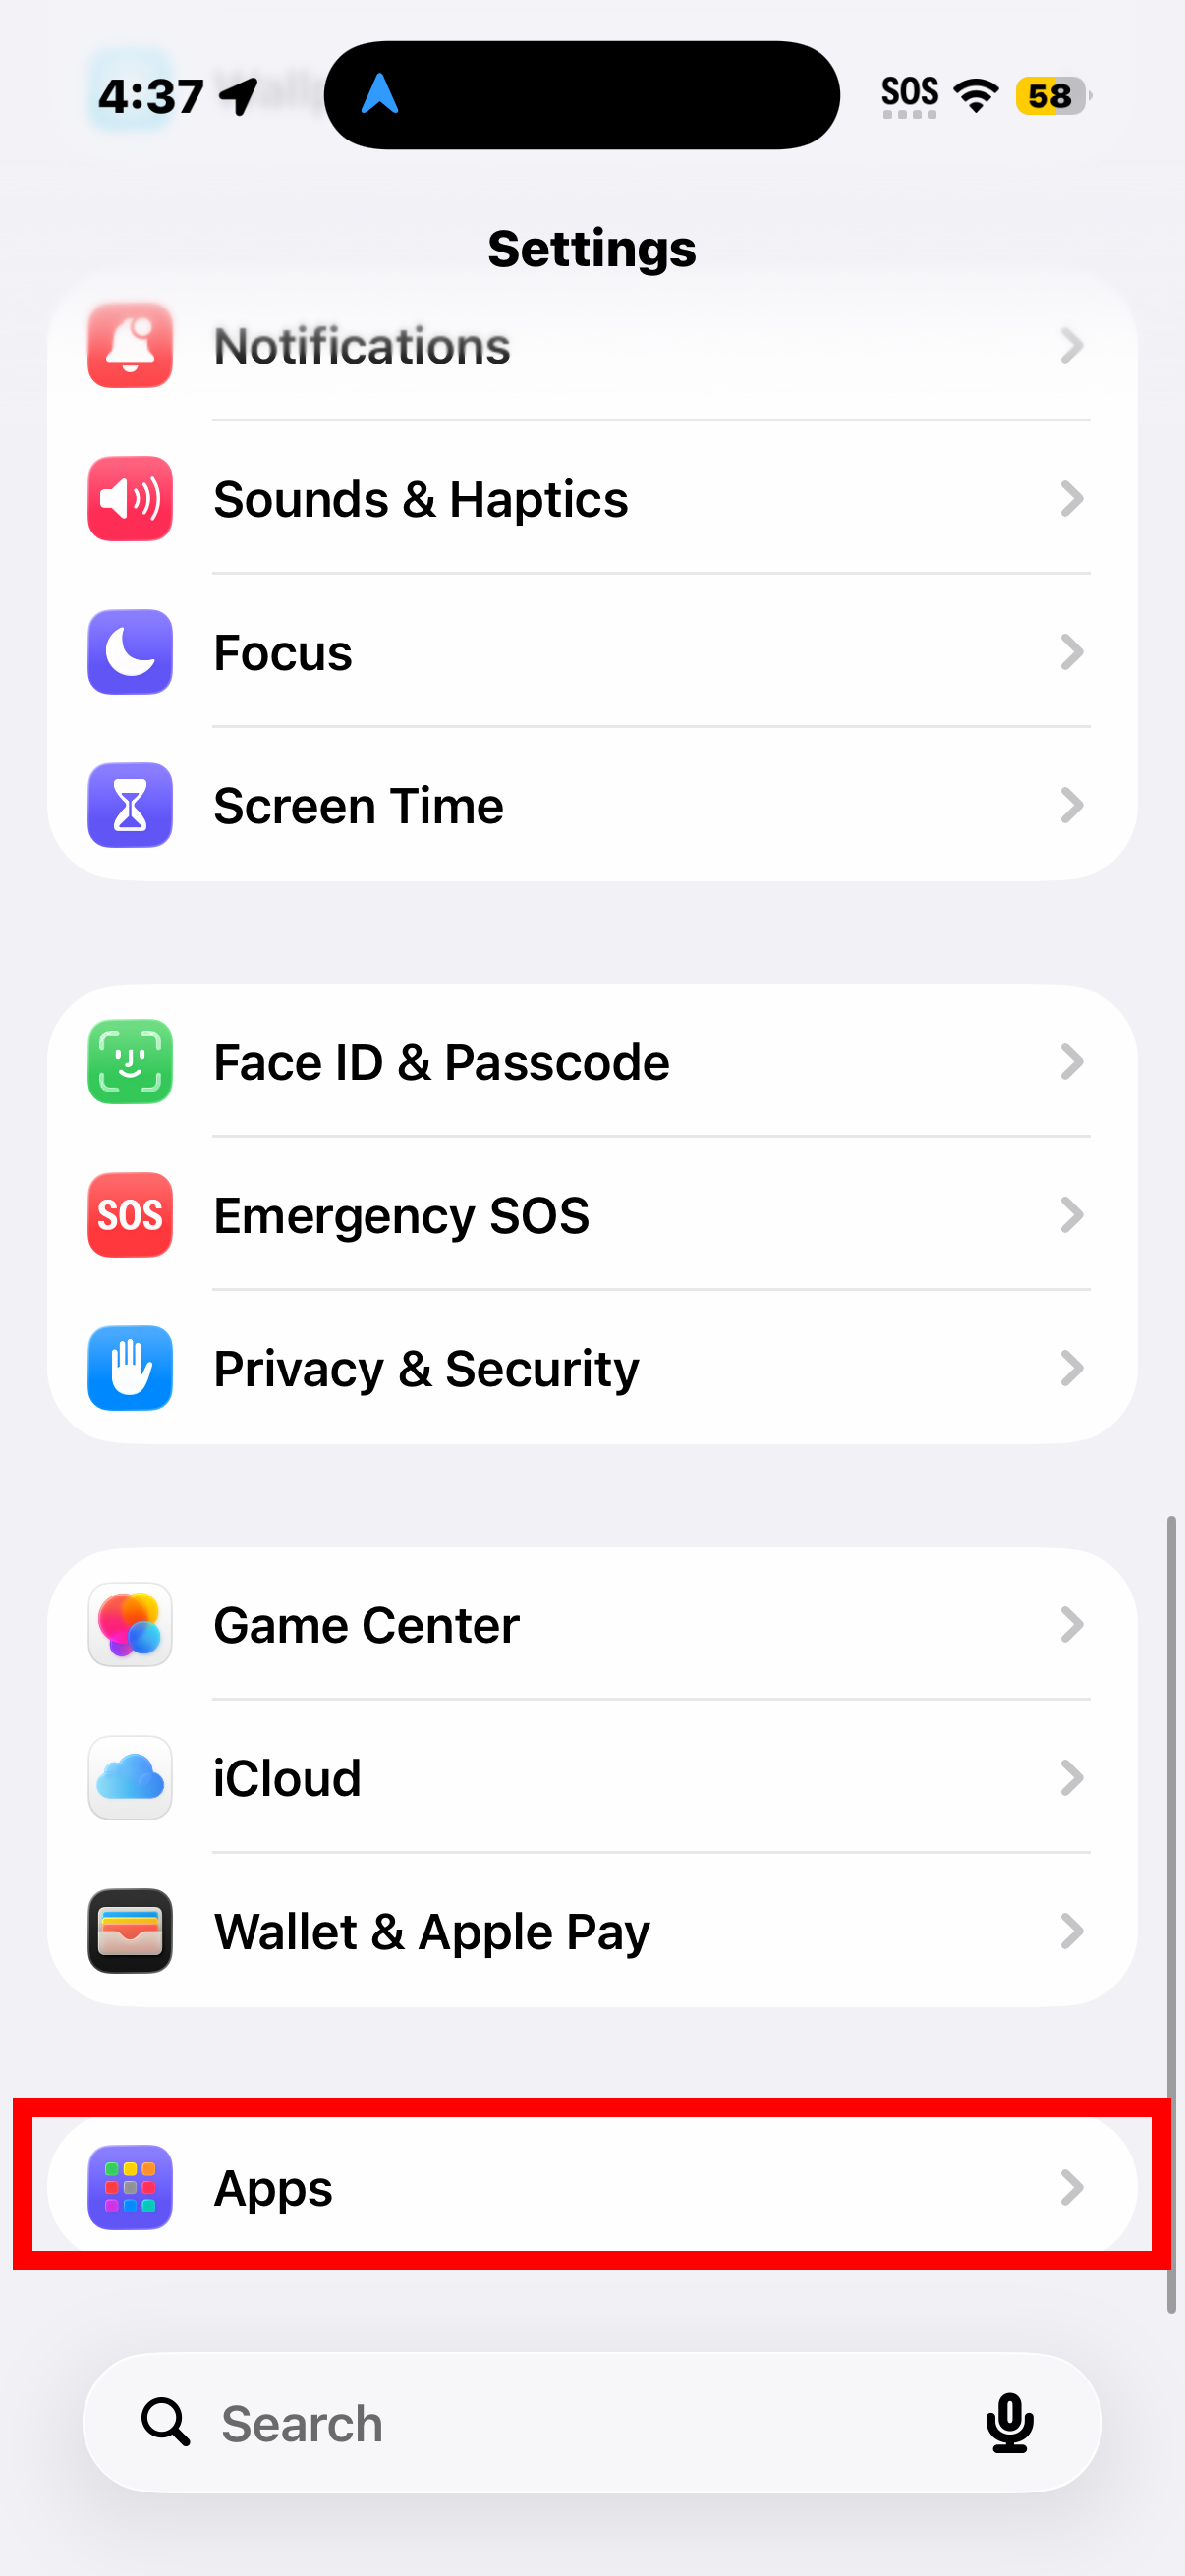
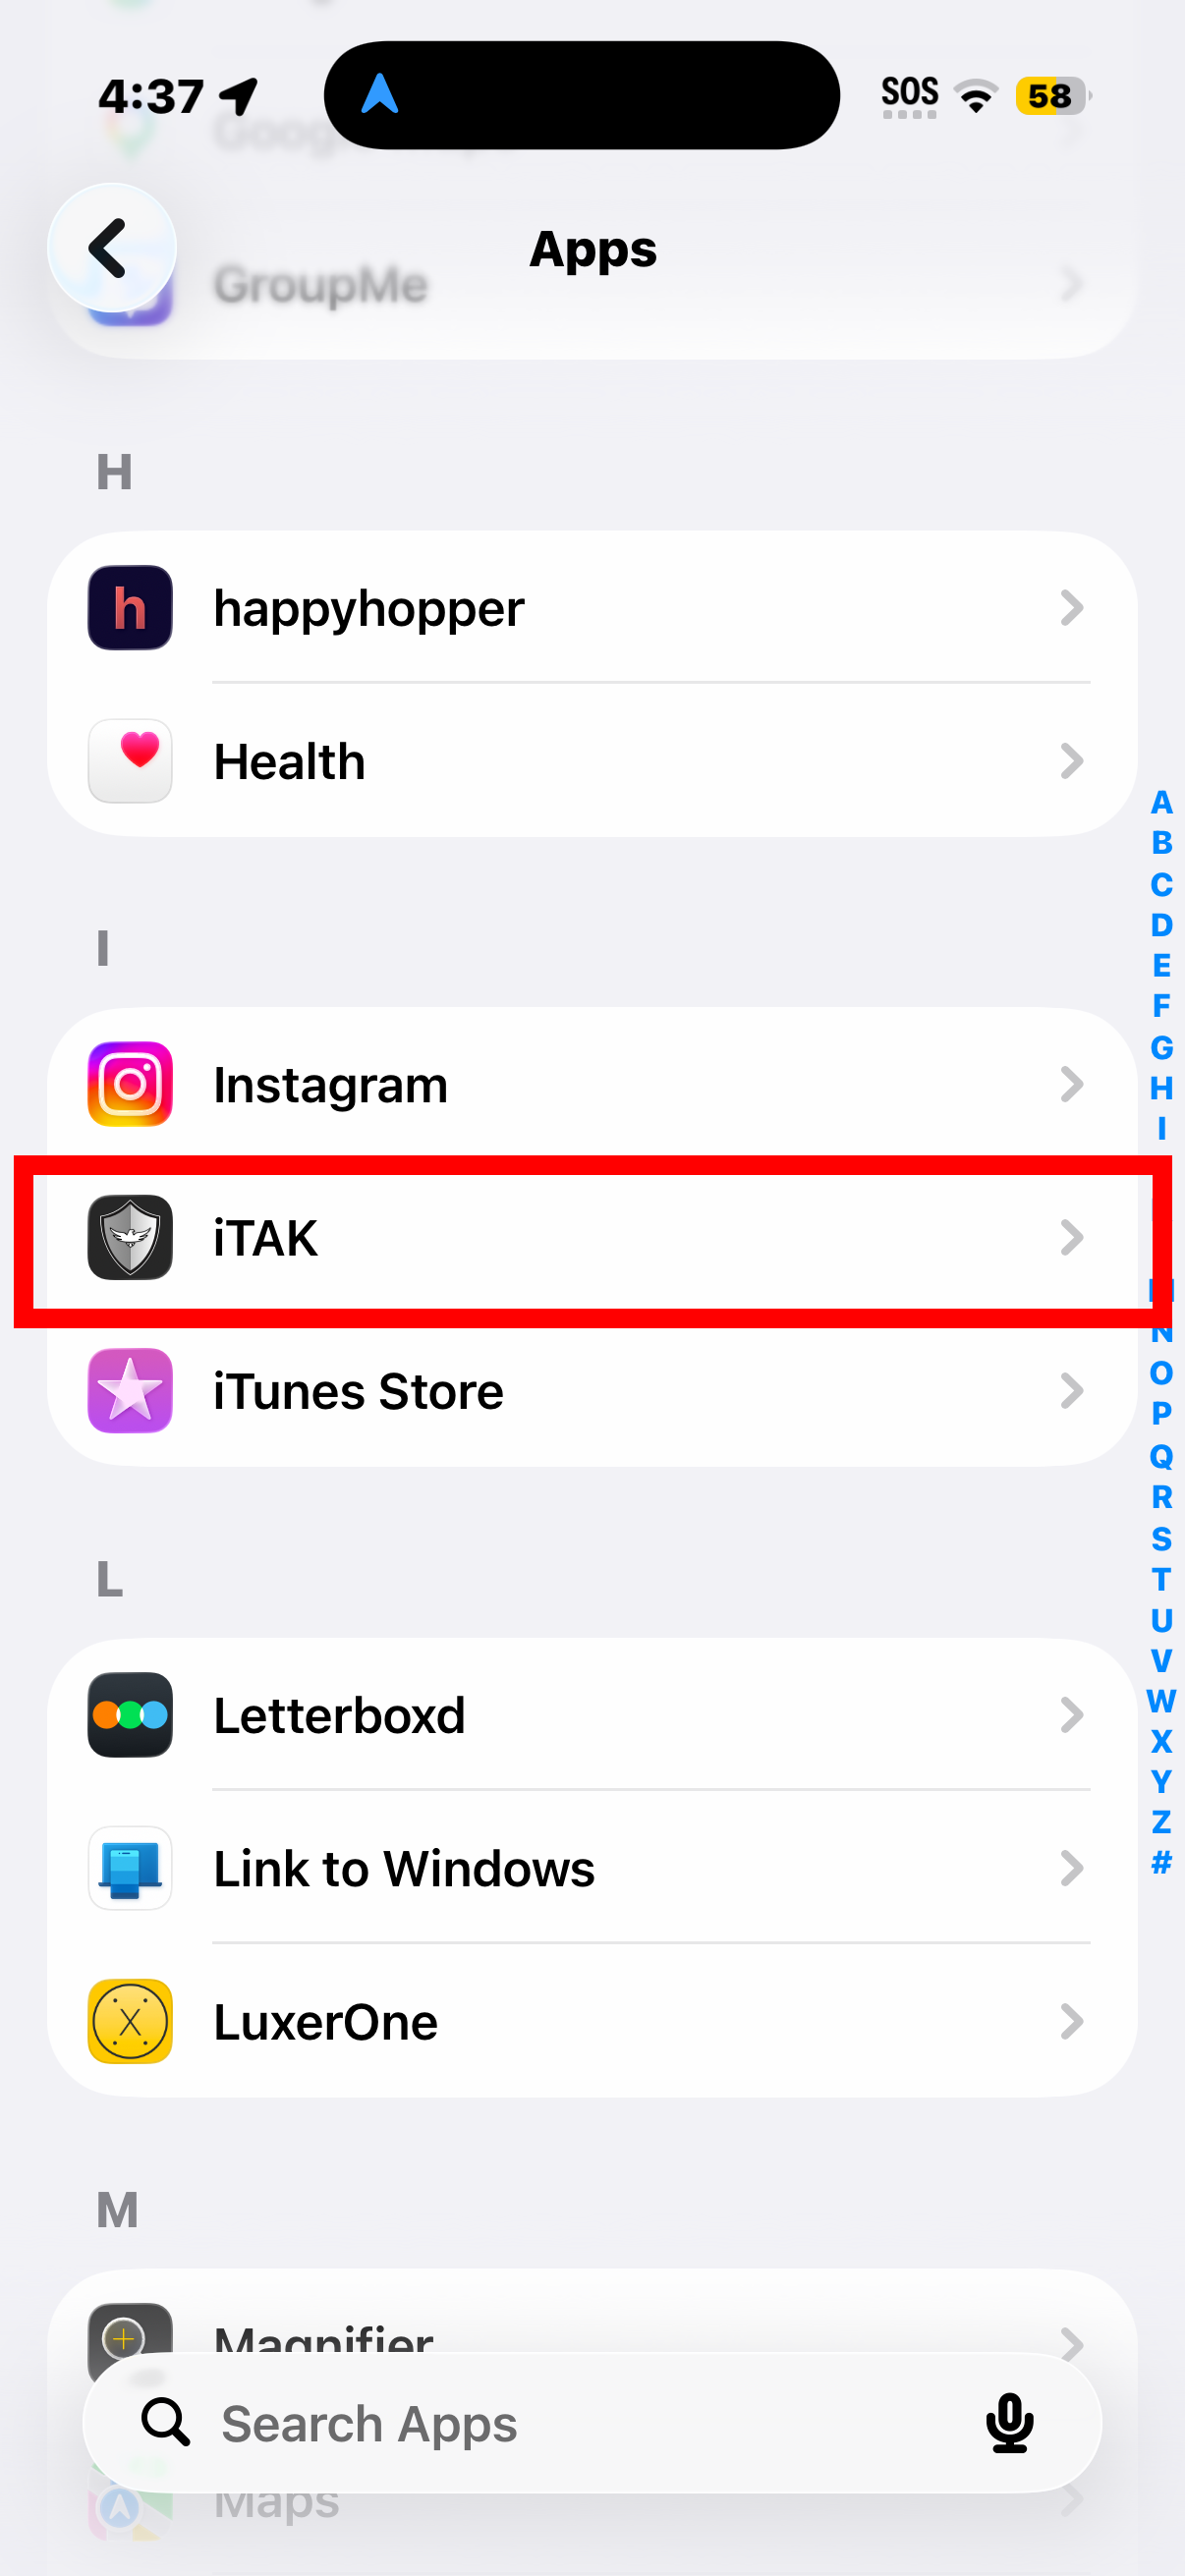
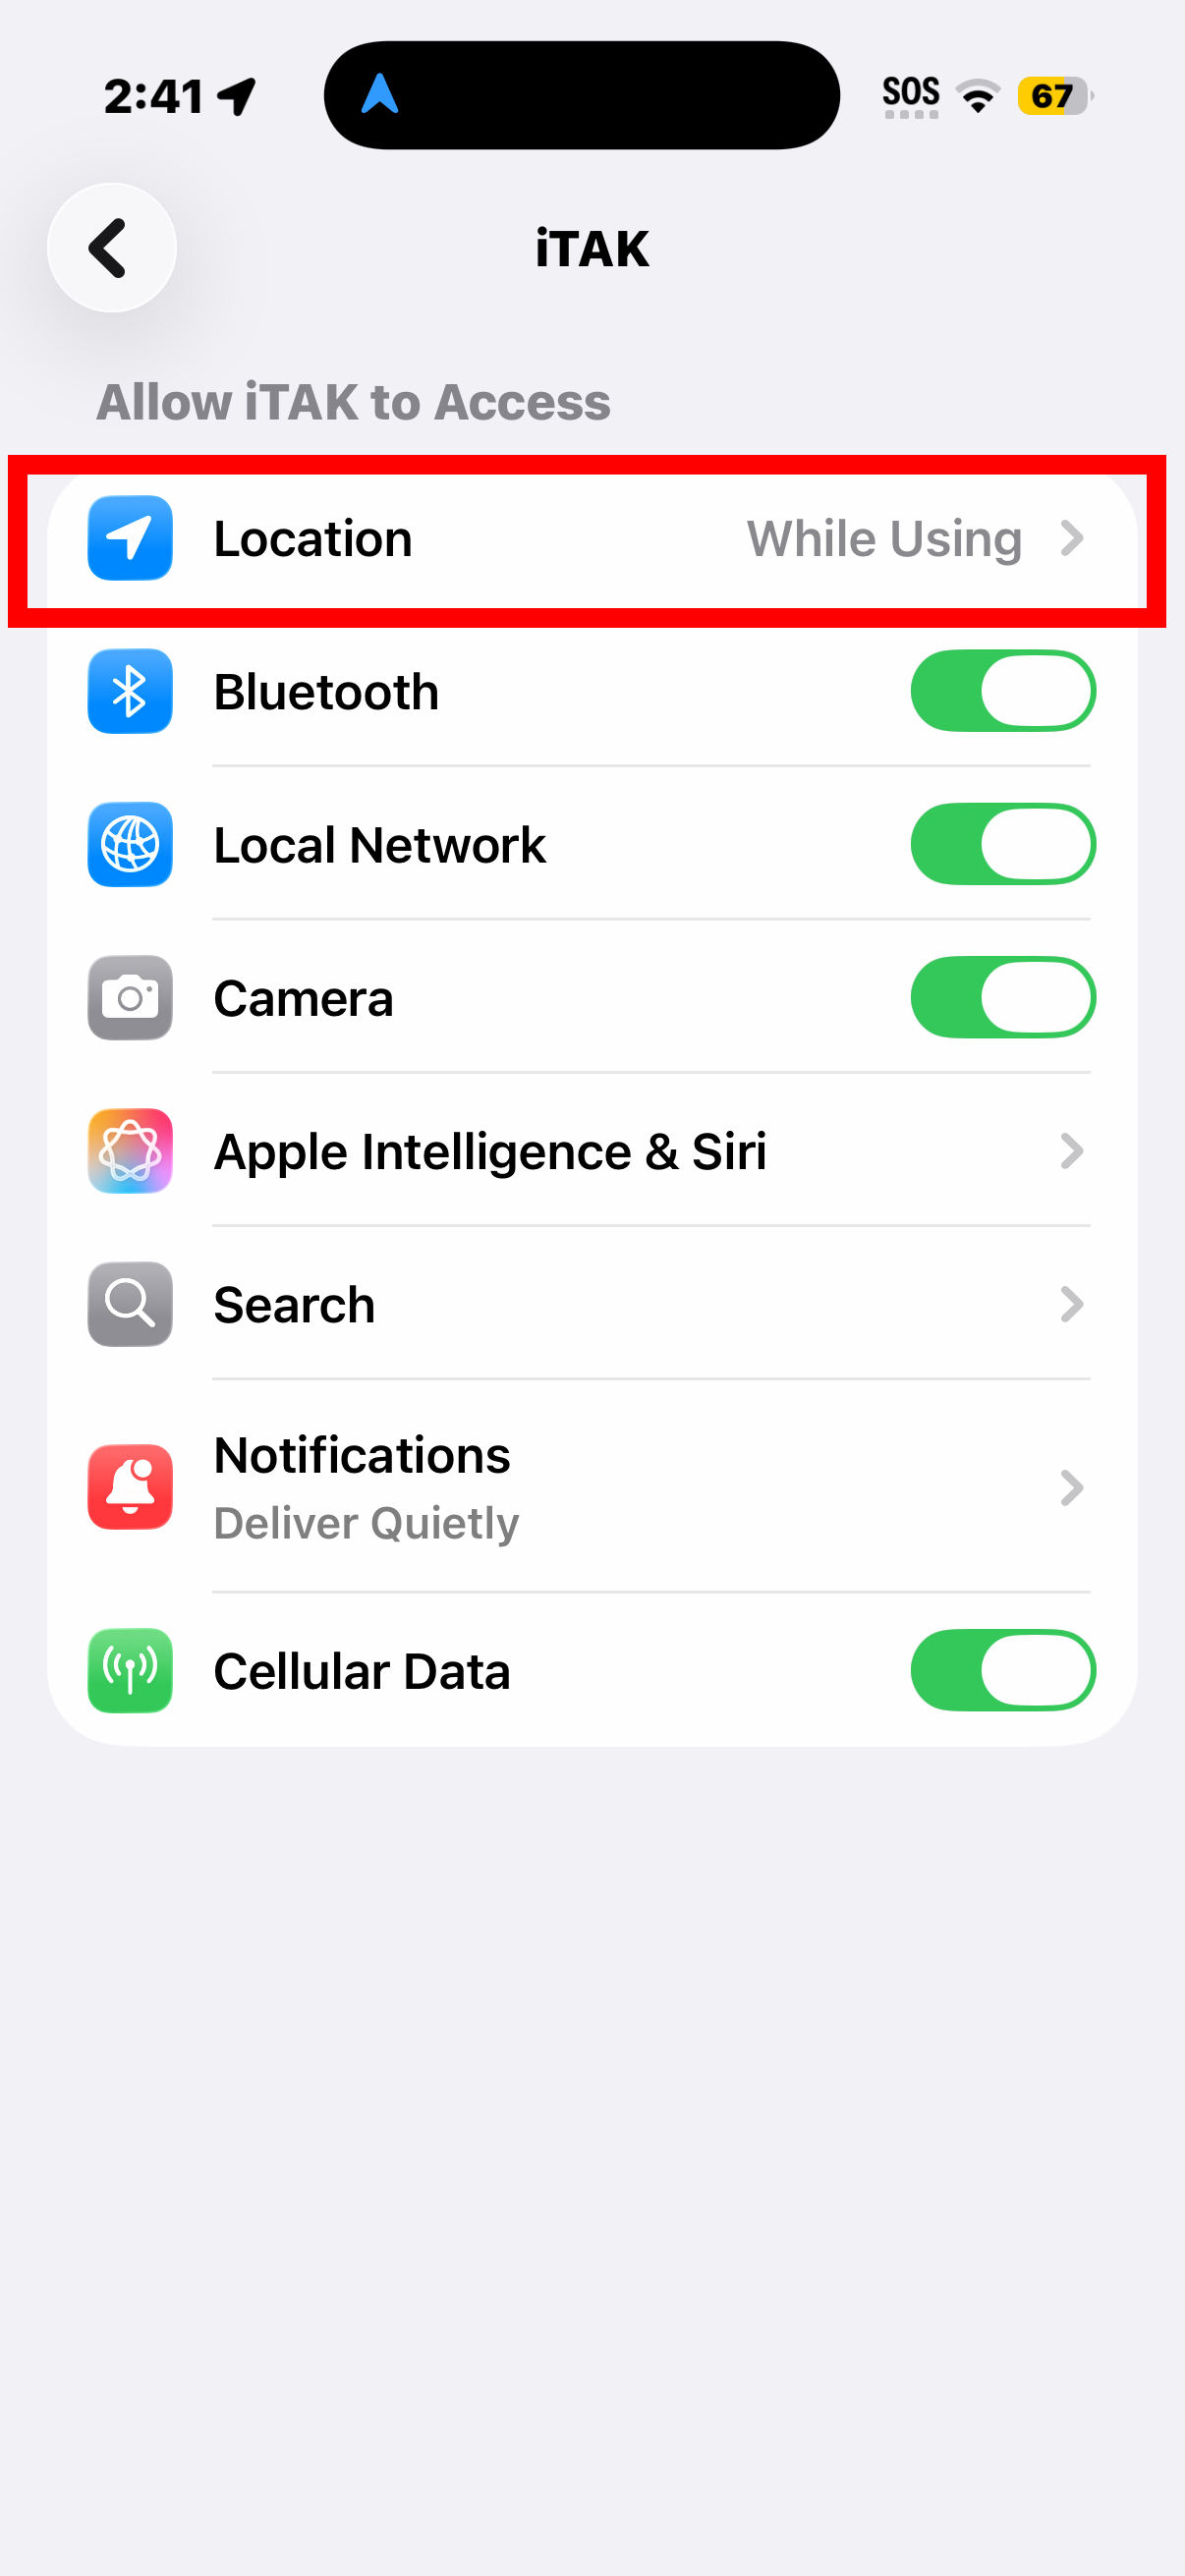
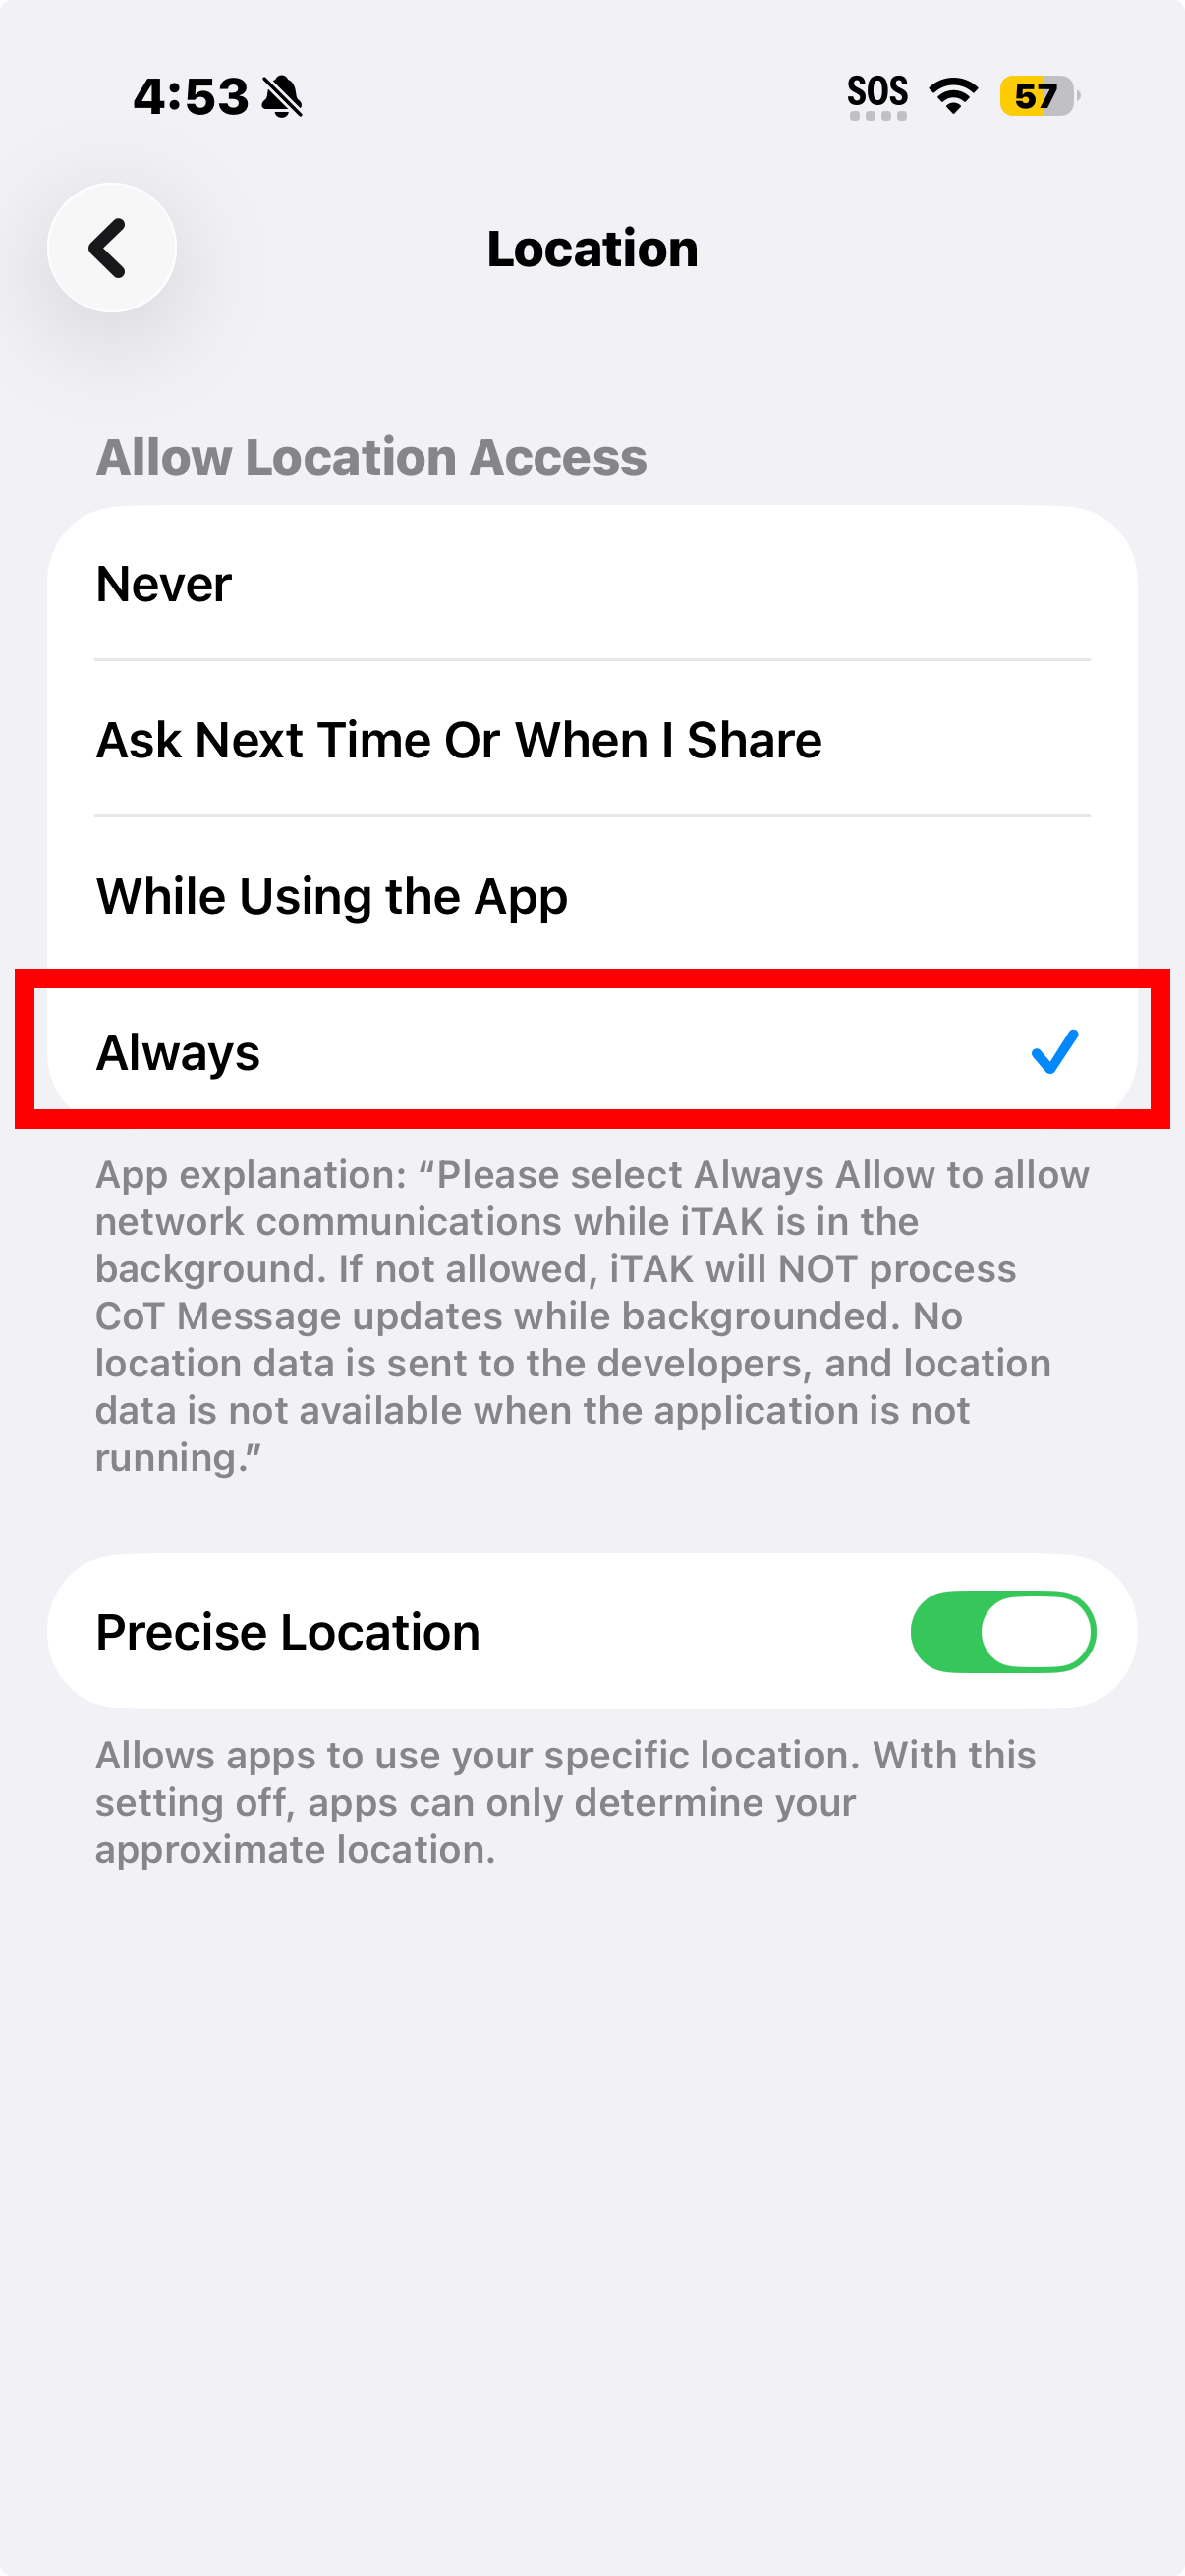
If My Location already says GPS and you still have no location, give iTAK the phone’s location — follow the screenshots:
- Open iPhone Settings, scroll to the bottom and select Apps.
- Find iTAK in the list.
- In iTAK’s settings, select Location.
- Set allow location access to Always, and turn Precise Location → ON.
- Then force-quit iTAK and reopen it (swipe it away in the app switcher), and go outside a minute for the first GPS lock.
 |
 |
 |
 |
Also check: the master switch at Settings → Privacy & Security → Location Services must be ON, and if Screen Time → Content & Privacy Restrictions is on, Location Services must be set to Allow there too.
Still stuck? Put the phone next to a working one and compare these same settings — whatever’s different is the cause. If nothing is, delete and reinstall iTAK (re-scan the QR to reconnect).
Equipment
- Inventory guide — recording and looking up team gear